This page covers how to manage artifacts and build prediction services on models.
Artifacts & Models
An artifact is a versatile data entity that serves as a superset of a dataset and can exist in various formats such as ZIP files, folders, XLS, Parquet, and more. Artifacts can be uploaded to the canvas flow and used as inputs for running recipes. For recipes or templates to work with artifacts, they must be explicitly configured for artifact input in the flow. Running these recipes also generates an artifact as output, enabling seamless data processing workflows.
A trained model, on the other hand, is an output generated after executing a model builder transformation within a machine learning pipeline. All models created within projects under a specific tenant are stored in the Model Catalog, allowing users to access and reuse these models for making predictions on live data.
Artifacts and Models at Different Levels
Project Level:
Artifacts and models generated as outputs from recipes or used as inputs in the project pipeline can be managed and viewed at the project level. Users can:
Upload new artifacts or reuse artifacts from other projects.
Add models from other projects to use within the current project.
Create prediction services directly from the project-level view.
Workspace Level:
Artifacts and models produced as outputs or used as inputs across various projects within the workspace can be accessed at the workspace level. Users can:
Upload new artifacts and view models from multiple projects in one centralized location.
Create prediction services using models generated across the workspace.
Adding Artifacts at the Project level
Use this procedure to add artifacts to a project.
To add artifacts to a project:
Hover over the menu icon and select Projects.
Select the project in which you want to add artifacts. This navigates you to the canvas page.

Click the Artifacts and Models option from the project level navigation. This opens the Artifacts tab, where you can view the existing artifacts generated after running the pipeline in the project.
Click the plus button to select either Create New Artifact or Add Existing.
Select Create New Artifact. This opens the Create Artifact dialog.
Provide the artifact name.
Click BROWSE FILE to browse and upload artifacts.
Click Create Artifact.
To add more files to this artifact, click on the artifact and use the plus icon to upload additional files.
Select Add Existing option.
Select the checkboxes corresponding to the artifacts you want to add to the project from the Add Artifact window. Use the search box to locate a specific artifact if there are too many to browse through manually.
Click Add Artifact.
Review the artifacts:
- Name:
The name of the artifact.
- Updated on:
The artifact last updated on.
- Source:
The recipe using which the artifact is generated as an output. You can click to navigate directly to the project or recipe where the artifact was created.
- Destination:
The destination where the artifact is used as an input. You can view both recipe name and project name. You can click to navigate directly to the project or recipe where the artifact was used.
Adding models at the project level
Use this procedure to add models to a project.
To add models to a project:
Hover over the menu icon and select Projects.
Select the project in which you want to add artifacts. This navigates you to the canvas page.
Click the plus icon to open Add Models window.
Select the models that were generated in the other projects in this window and want to add to your project.
Click Add Model. Once the model is added, you can view this on the Models tab.
Review this information:
- Name:
The name of the model.
- Created:
The date on which the model was created.
- Prediction Service:
The prediction service created with the model. If a service has been created, you can click the link to navigate directly to it. If not, click +Add to configure a new prediction service.For more information, see Creating the prediction service.
- Source:
The recipe associated with the project that was used to generate the model. You can click to navigate directly to the project or recipe where the model was created.
Creating an artifact
Use this procedure to create an artifact and add multiple files to an artifact.
To create an artifact:
Hover over the menu icon and select Artifacts & Models.
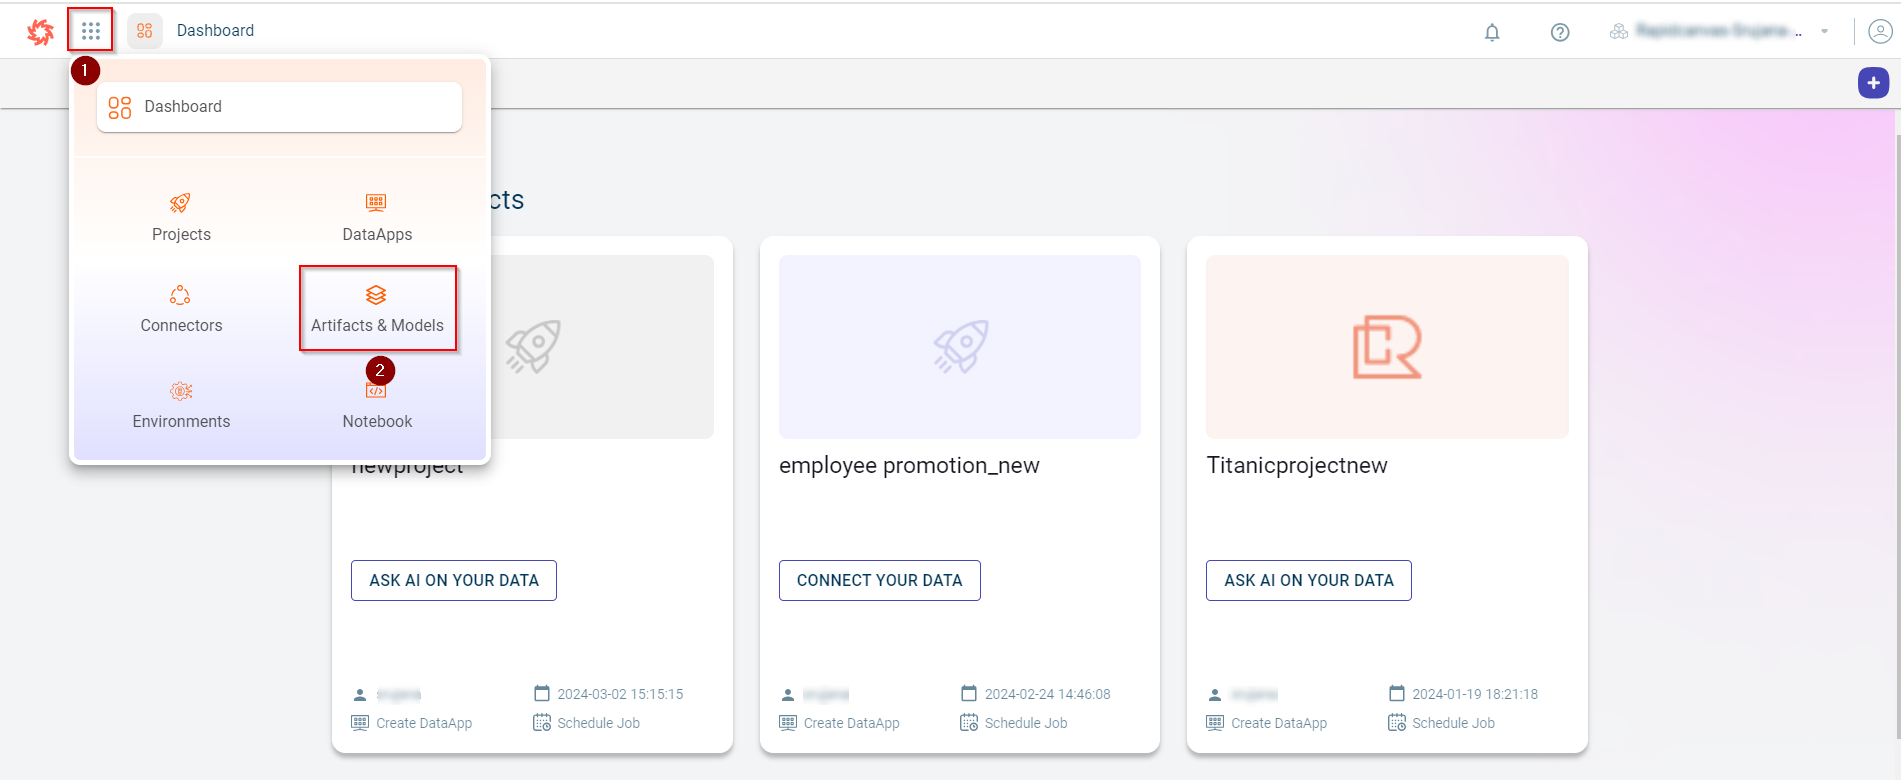
The Artifacts tab is displayed.

Click the plus icon. If the page does not have any artifact, you can view +Create Artifact option in the workspace. The Create Artifact window appears.

Specify the artifact name in the Artifact Name field.
Click BROWSE FILE to browse and upload the file to this artifact folder from your local system. You can view the artifact file added with the file name, file size and file type after adding.
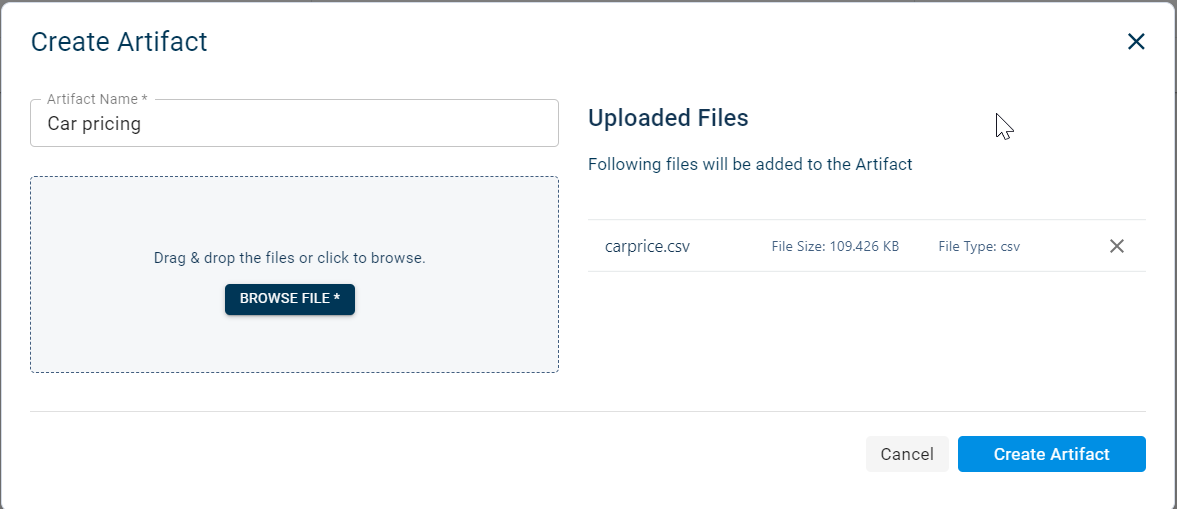
Click Create Artifact. The artifact gets created and you can view this on the Artifacts tab
Important
You cannot delete the artifacts that are used in the canvas flow.
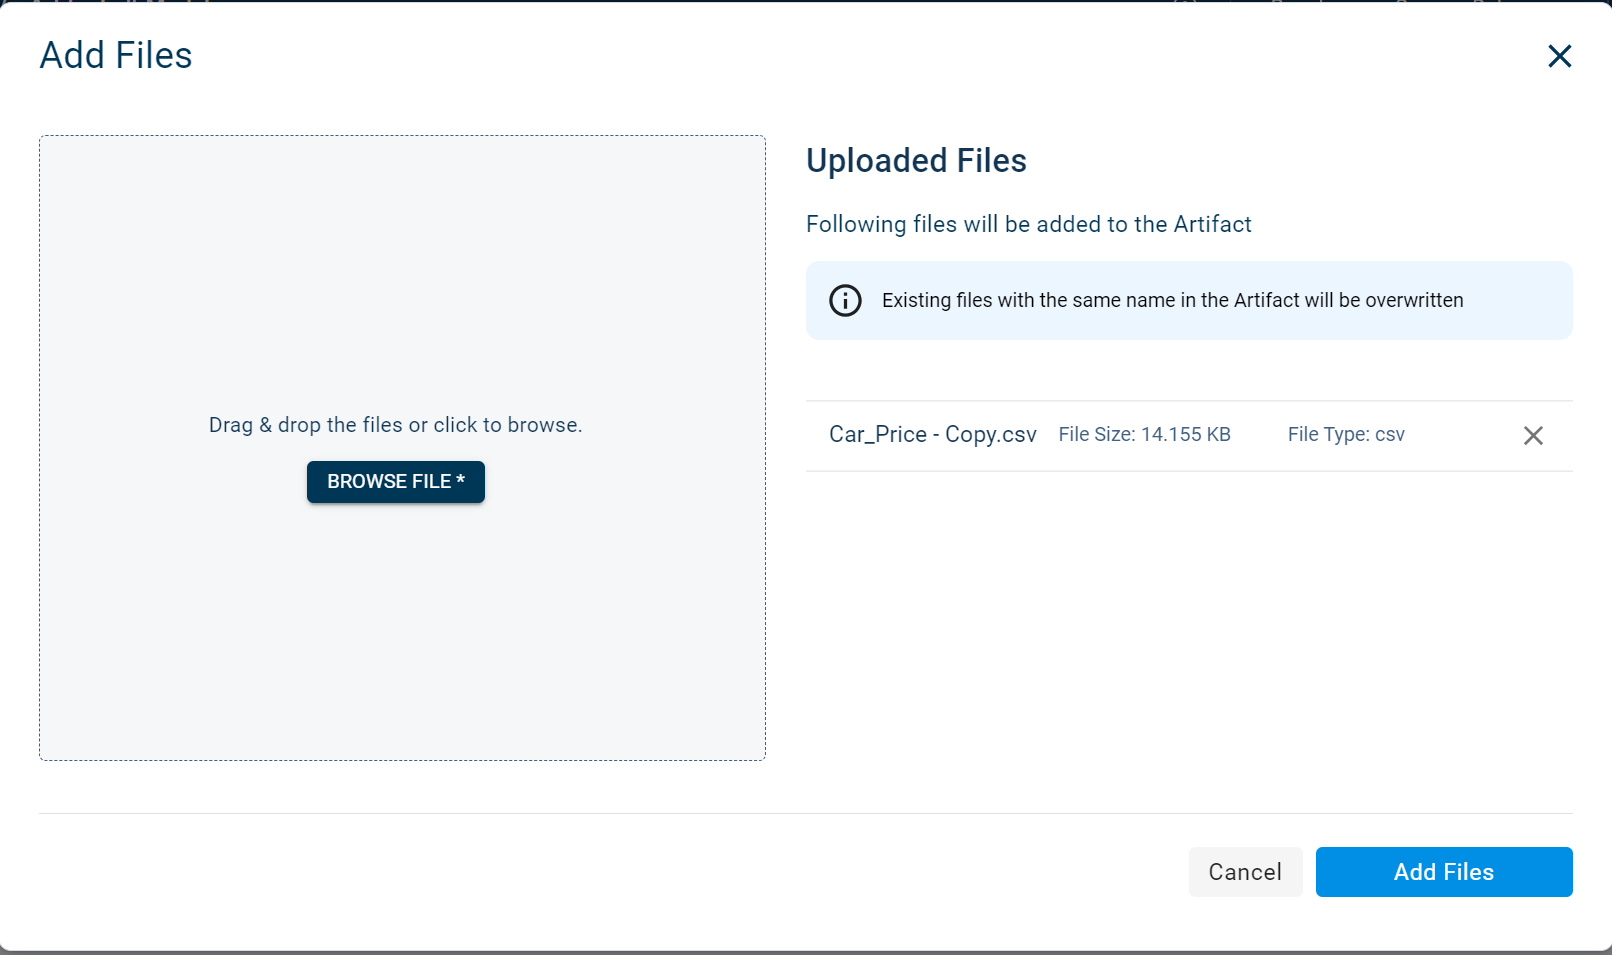
If you want to add another file to an existing artifact, click on the artifact. This artifact page is displayed showing the existing files associated with this artifact in the Files section.
Click the plus icon.

This opens the Add files window.
Click BROWSE FILE to browse and upload another file to this artifact.
Click Add Files to add files to the artifact. You can follow the same procedure to upload multiple files to this artifact.
Managing artifacts
Use this procedure to manage artifacts in a tenant.
To manage artifacts:
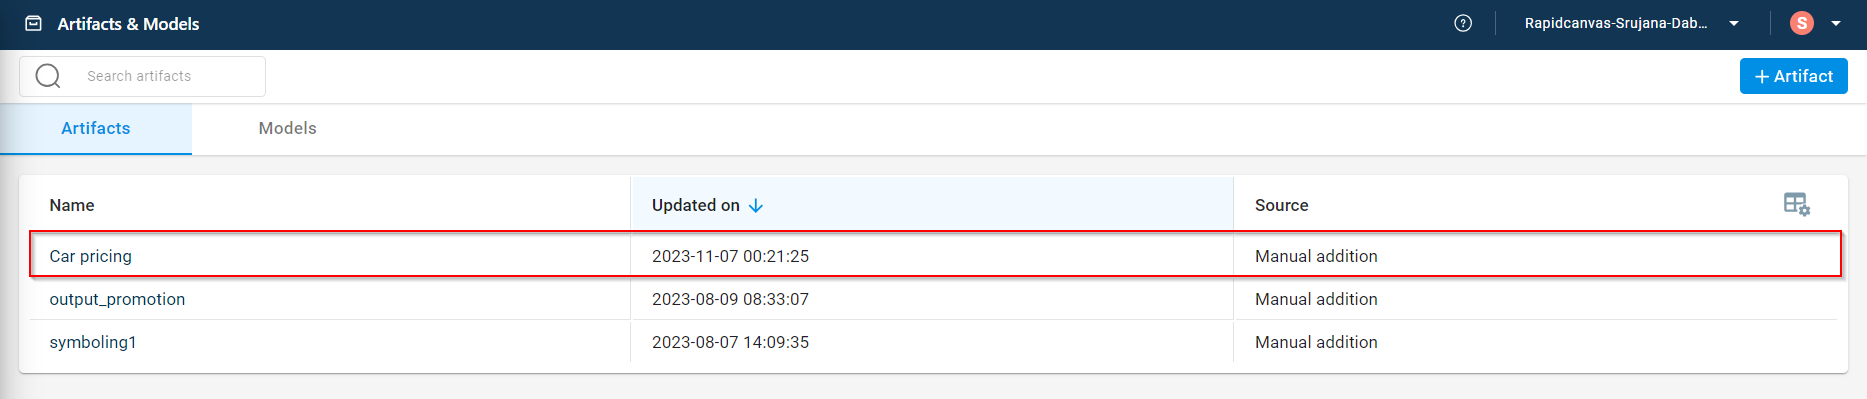
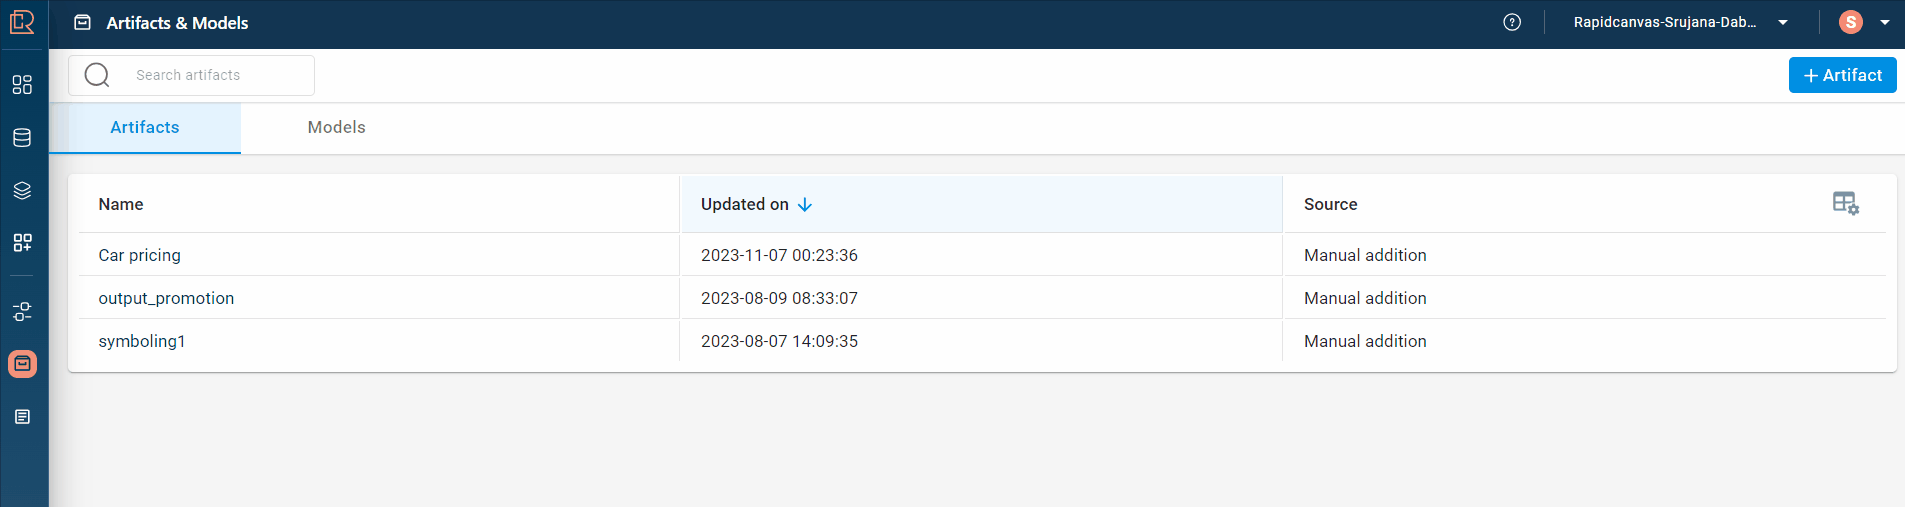
Select Artifacts & Models from the left navigation menu. The Artifacts tab is displayed where you can view the list of all artifacts in a tenant.
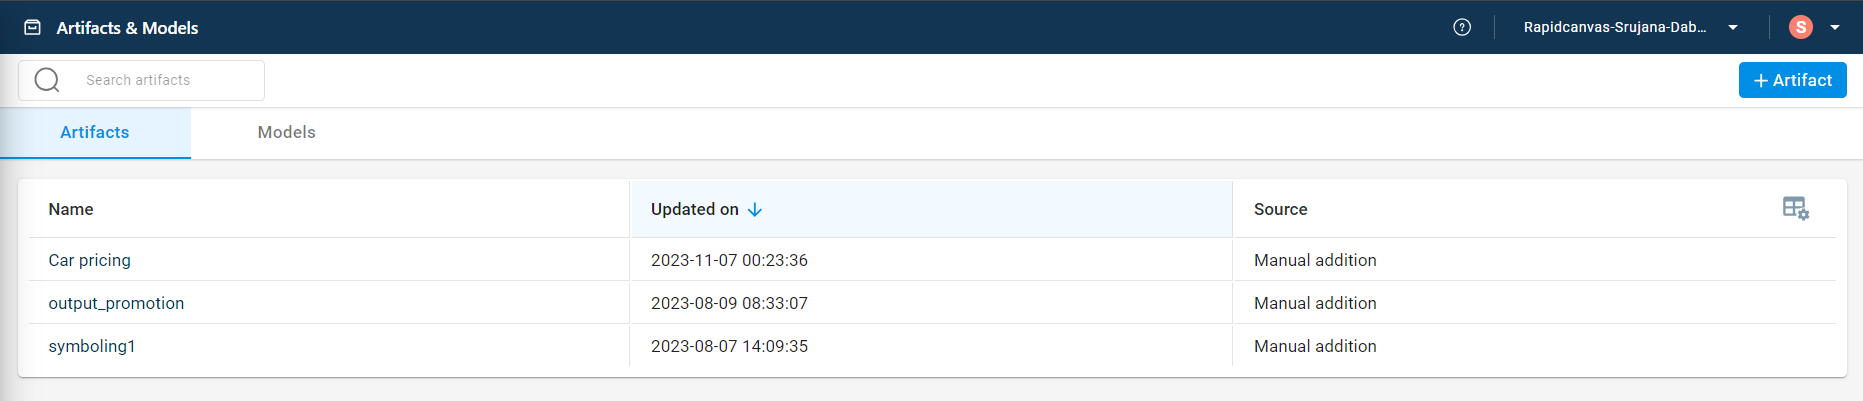
Review this information:
- Name:
The name of the artifact.
- Created:
The date on which the artifact is uploaded.
- Source:
The source from where the artifact has been uploaded. You can click to navigate directly to the project or recipe where the artifact was created. Possible values:
Manual addition
Project and recipe where the artifact was generated as an output.
- Destination:
Shows project and recipe where the artifact has been used as an input. You can click to navigate directly to the project or recipe where the artifact was used.
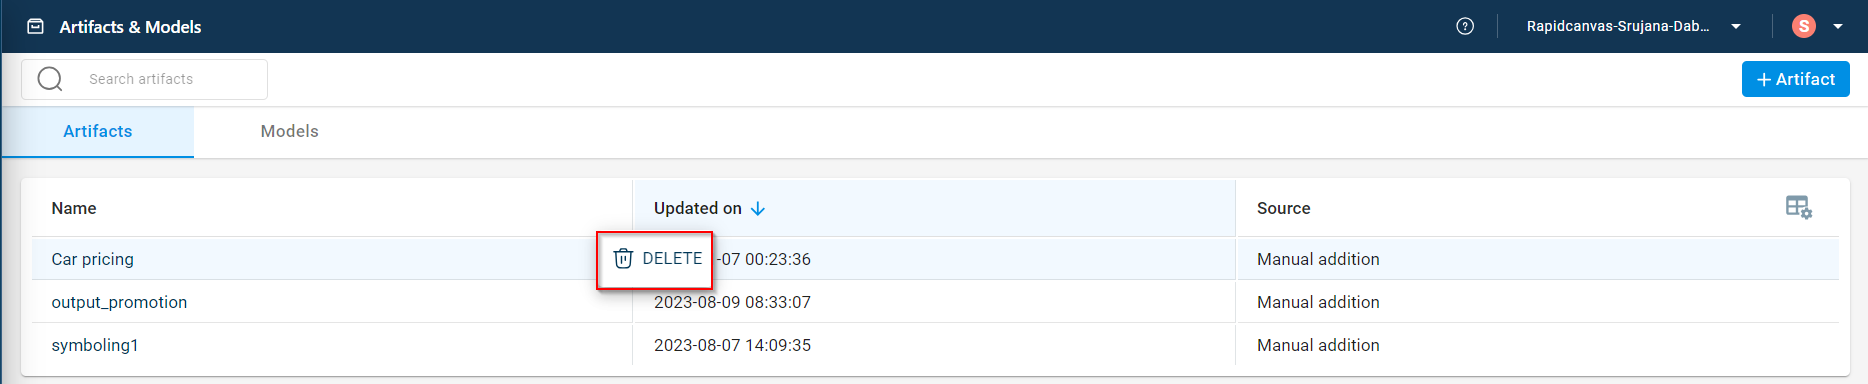
Note
When you rest the pointer on the artifact name, an ellipses icon is displayed. Select delete to remove the artifact from the list permanently. You can only use this option if the artifacts contain no files.
Click on a particular artifact name whose details you would like to view. The files tab is displayed.
Review this information:
- File:
The name of the artifact file.
- File size:
The file size of the artifact file.
- File Type:
The type of artifact file.
- Actions:
You can perform these actions:
download the artifact file, using the download icon.
delete the artifact file, using the delete icon.
- Preview the file, using the Preview icon.
add a new file to a specific artifact, using the +ADD FILE option.
Use the table settings icon to reorder the columns or select and deselect the columns you want to view in the table.

Note
You can use the search option to find a specific artifact from the list.
Viewing models
Use this procedure to view list of trained models generated in all the projects in a tenant. You can use the search option to look for model details you want.
To view models:
Select Artifacts & Models from the left navigation menu. The Artifacts tab is displayed.
Click the Models tab to view the list of models generated after running the machine learning pipeline in different projects.
Review this information:
- Name:
The name of the machine learning training model.
- Created:
The time stamp at which the model was generated.
- Source:
The project in which this training model is generated. You can click to navigate directly to the project or recipe where the model was created.
- Prediction service:
Click the +Add to create a prediction service. To add a prediction service, see Creating a prediction service.

Deleting a model
Use this procedure to delete a model.
To delete a model:
Click the Models tab to see the list.
Click the ellipses icon corresponding to the model you want to delete and then select DELETE.

Note
You cannot delete the model that is created in a project, but can delete the models that are added manually.
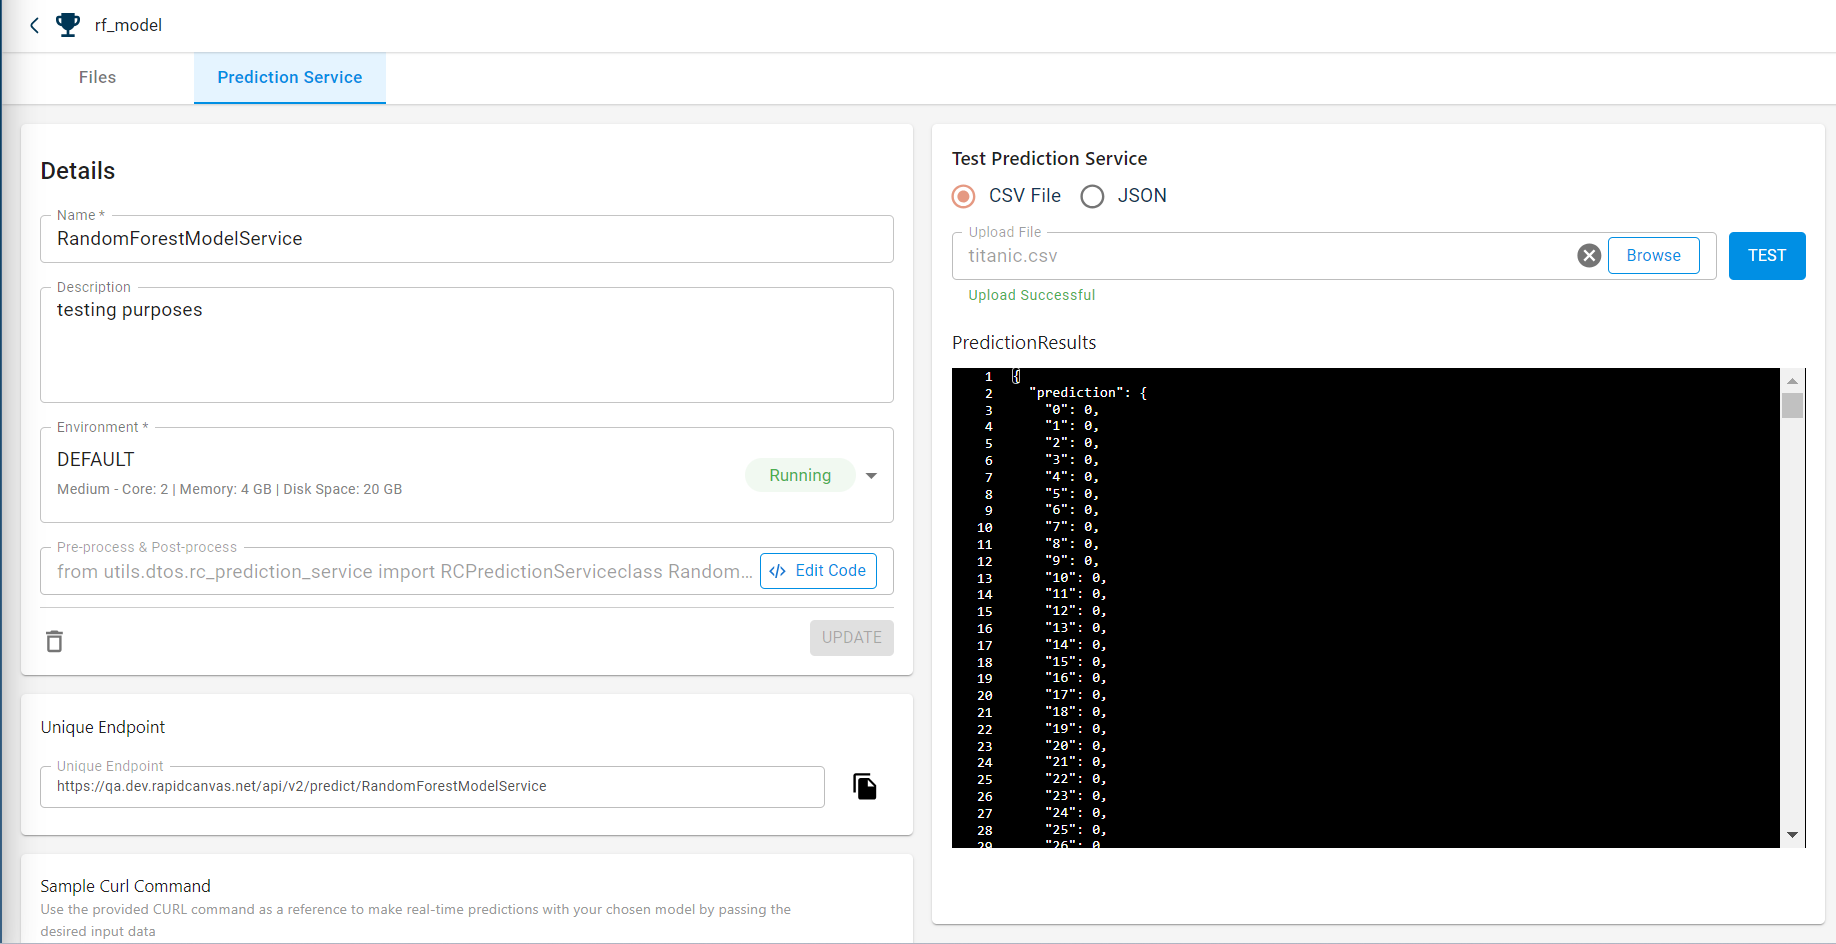
Prediction services
Prediction Service allows you to send real-time data to a model and receive predictions immediately. You can create an endpoint of the model that is exposed as an API and upload the test dataset. This API that has the model that makes predictions on the uploaded data.
Creating and testing a prediction service
Use this procedure to create a prediction service or an endpoint of the model. This service can only be created for models generated after running the data pipeline in a project (or) on models that are manually added. After generating the model as an API, you can test this model on the uploaded dataset to make predictions.
Select Artifacts & Models from the left navigation menu. The Artifacts tab is displayed where you can view the list of all artifacts in a tenant.
Click the Models tab to see the list of models created in this tenant.
Click +Add in the Prediction Service column and corresponding to the model whose API you want to create. This displays the Prediction Service tab.
Specify this information in the Details section:
- Name:
The name of the prediction service.
- Description:
The description of the prediction service.
- Environment:
The environment in which you want to test the prediction service.
- Pre-process & Post-process:
If needed, you can add pre-processing and post-processing steps with the integrated code editor.
Specify the Configuration Options:
- Timeout:
The duration (in minutes) after which the incoming request should time out.
- Concurrency:
The number of parallel requests you can send. The acceptable number of requests you can send at a time ranges from 5 to 100.
Enable the Save History option to view a detailed record of activities that occurred in the prediction service. Disable this option to stop tracking logs.
Click Save to create the endpoint for the model.
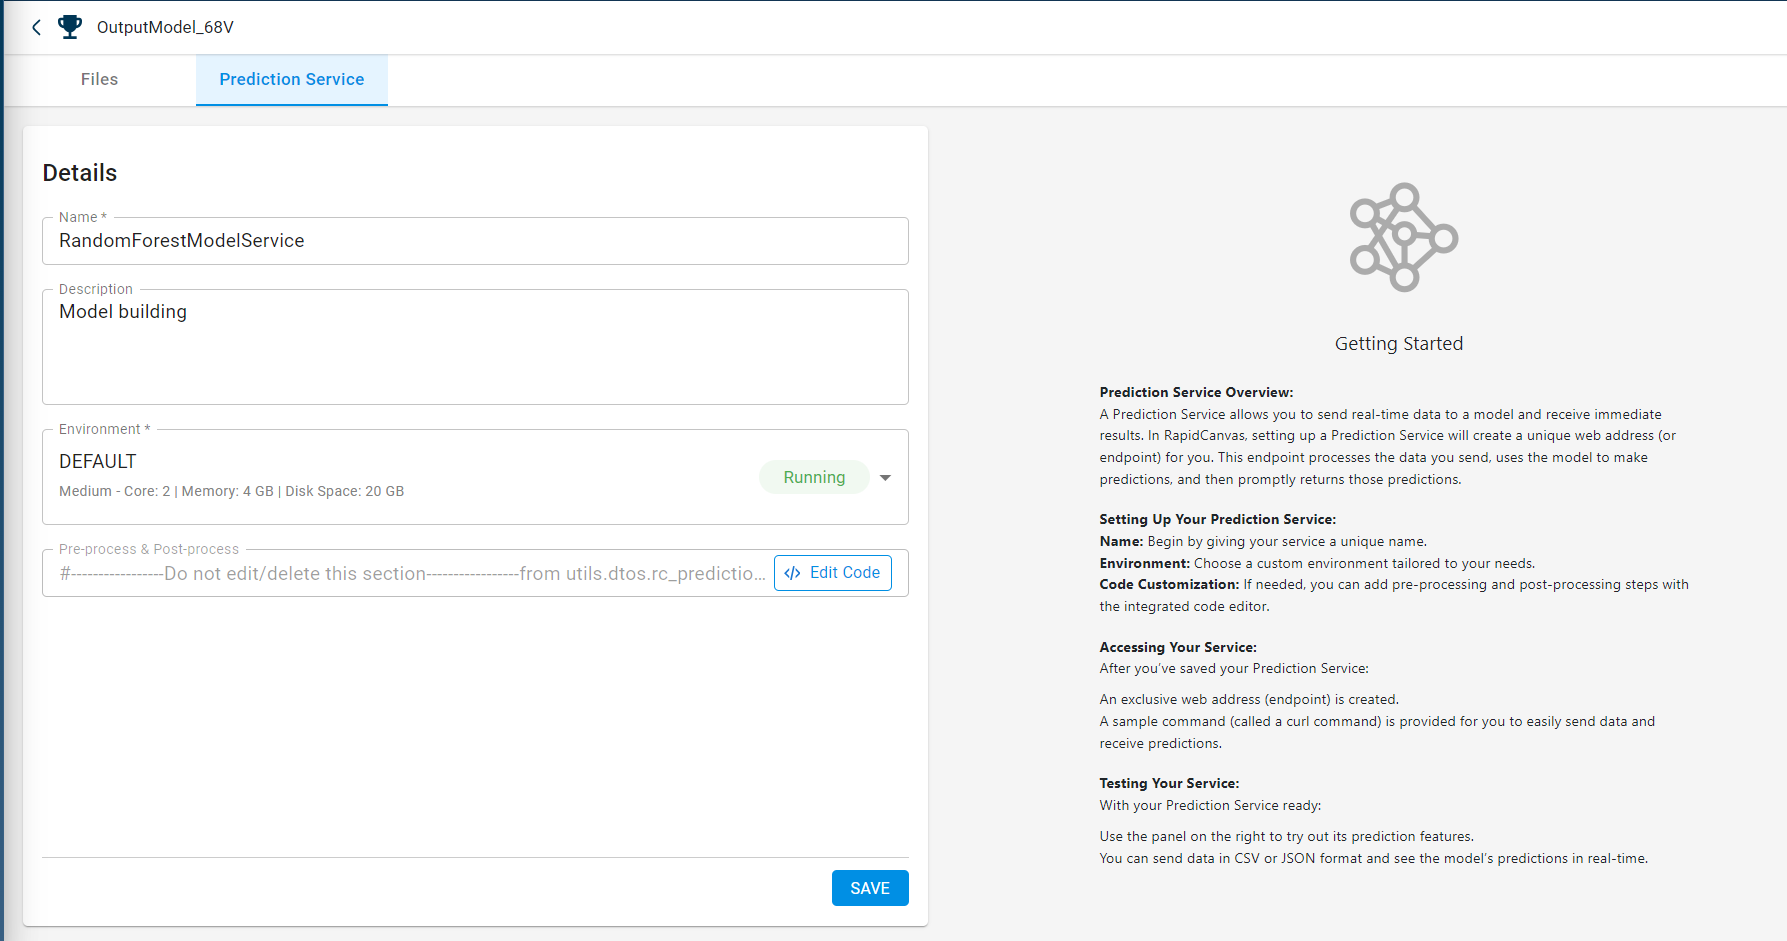
This generates a unique endpoint for the model and the CURL command.
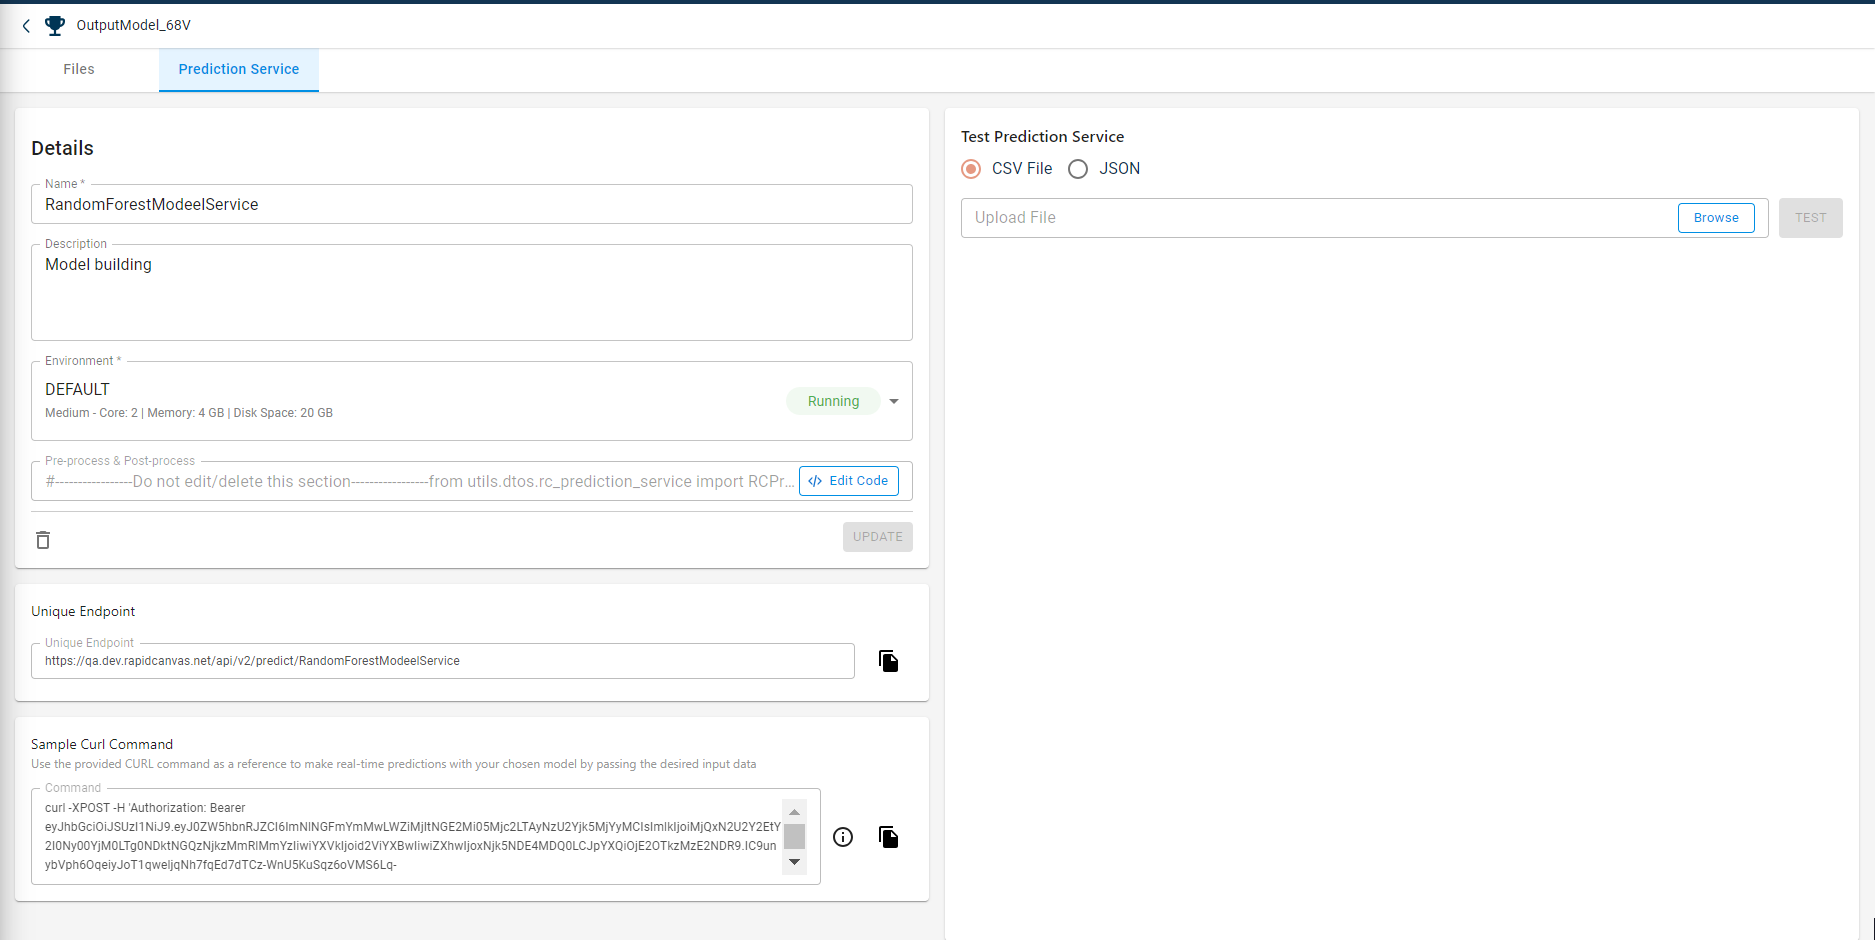
Select the file formats. Possible values:
JSON
CSV/XLSL/XLS File
Canvas Datasets
Click Browse to upload the file either in the CSV or JSON format based the selected file format.
Click Test to check the prediction results.
Click History to view a comprehensive list of all times when the prediction service has been executed. For more information, see Viewing the prediction service history.
After testing the prediction service on an uploaded dataset, you will see two options: Download as CSV and Add to Canvas. You can either download the CSV file to view the output using the ‘Download as CSV’ option, or add the dataset to the canvas using the ‘Add to Canvas’ option
Note
You can review logs from the past 30 days by clicking the Logs option. This provides detailed information, including:
Types of queries executed
Number of successful queries
Number of failed queries
Logs are accessible only if the Save History toggle is enabled. Additionally, you can export logs using the following options:
Export: Download logs as a .txt file via the export option in the side panel.
Open in New Tab: View logs in a separate tab for better visibility and analysis.
Use this procedure to view the list of times the prediction service was executed in the past 30 days.
Select Artifacts & Models from the left navigation menu. The Artifacts tab is displayed where you can view the list of all artifacts in a tenant.
Click the Models tab to see the list of models created in this tenant.
Search for the model whose prediction service history you want to view.
Click the link under the prediction service. This takes you to the Prediction Service page of the respective model.
Click History on top of the Test Prediction Service section.
Review this information:
- Start Time:
The timestamp indicating when the prediction service began executing.
- End Time:
The timestamp marking when the prediction service execution was completed.
- User:
The user who initiated the prediction service run.
- Status:
The current status of the prediction service run (such as success, failure).
- Info:
Details of the request and response generated after the prediction service execution.
- Tracking ID:
A unique tracking ID generated for every run.
- Request ID:
A unique Request ID is now generated for every run. To view this in the table, you need to enable the Request ID column from the table settings.
The filter option allows you to refine records by status, enabling you to display success, failure, or both.