This page covers how to create an environment and configure Python packages in the environment to run projects.
Environments
The environment is a space to store and manage projects. A default environment is created at a tenant level and assigned to projects that have no environment selected, during the project creation process.
You can create multiple environments in a tenant and choose the environment in which the projects must be created. The environment offers dedicated hardware to run flows faster. In each environment, you can install different set of Python packages of different versions to run the transforms used in the flows successfully. All the environments created in the application are independent of each other. The Python and Linux libraries installed in one environment are dedicated to that environment.
Environment dashboard
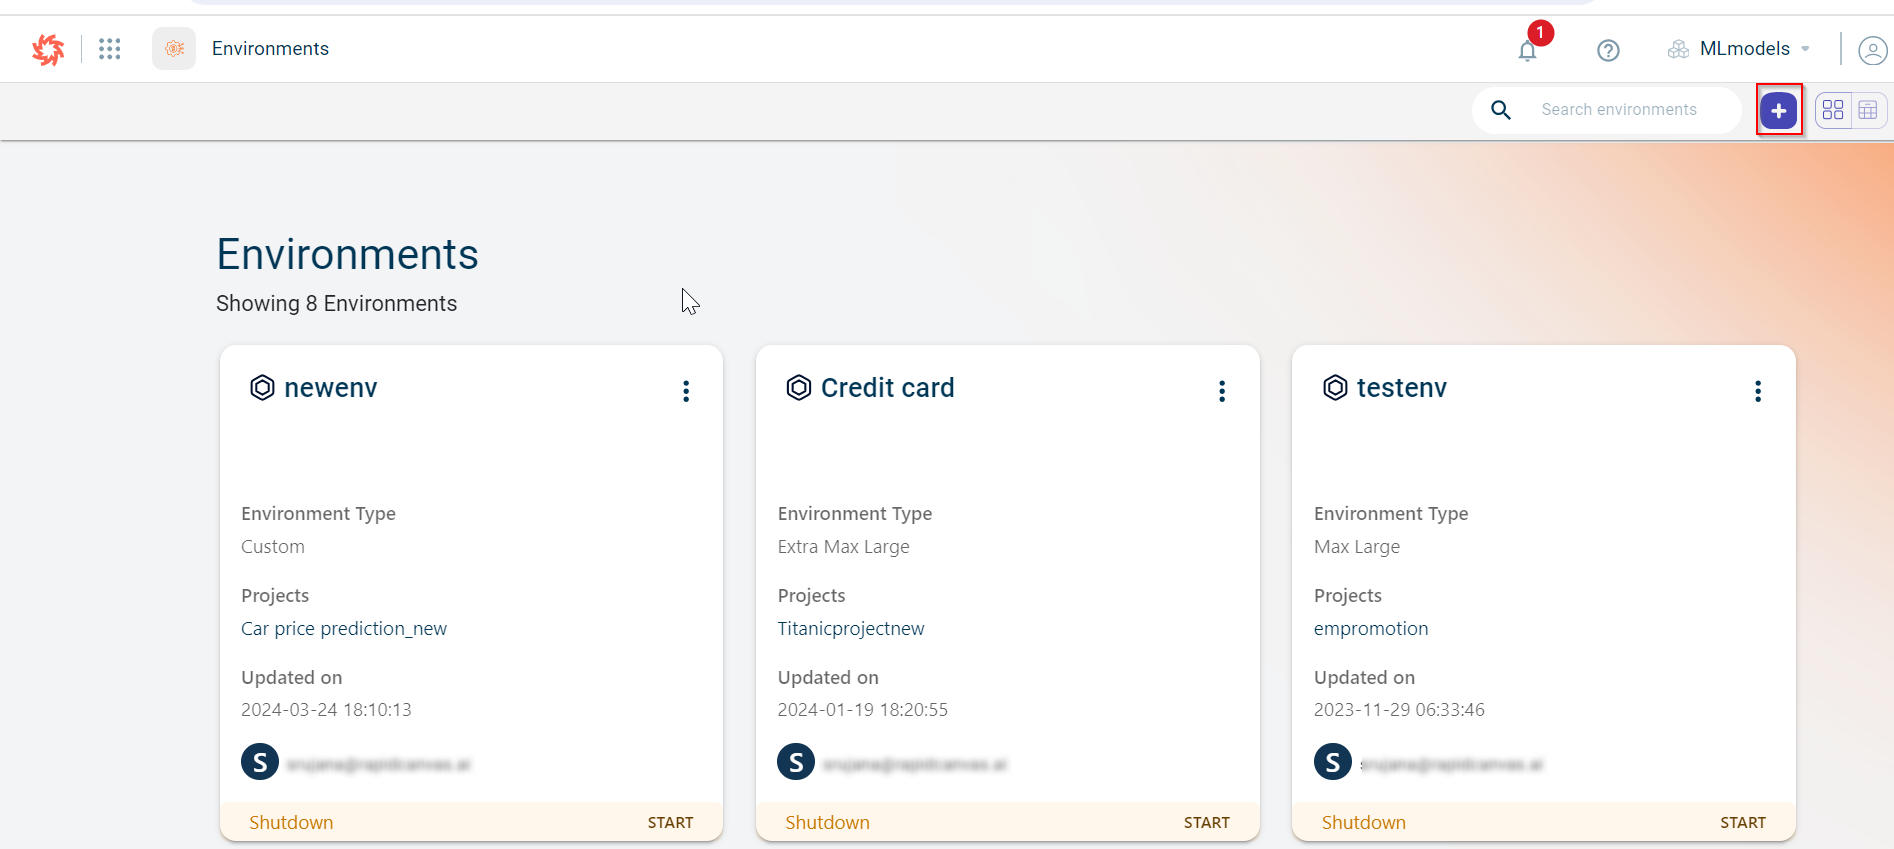
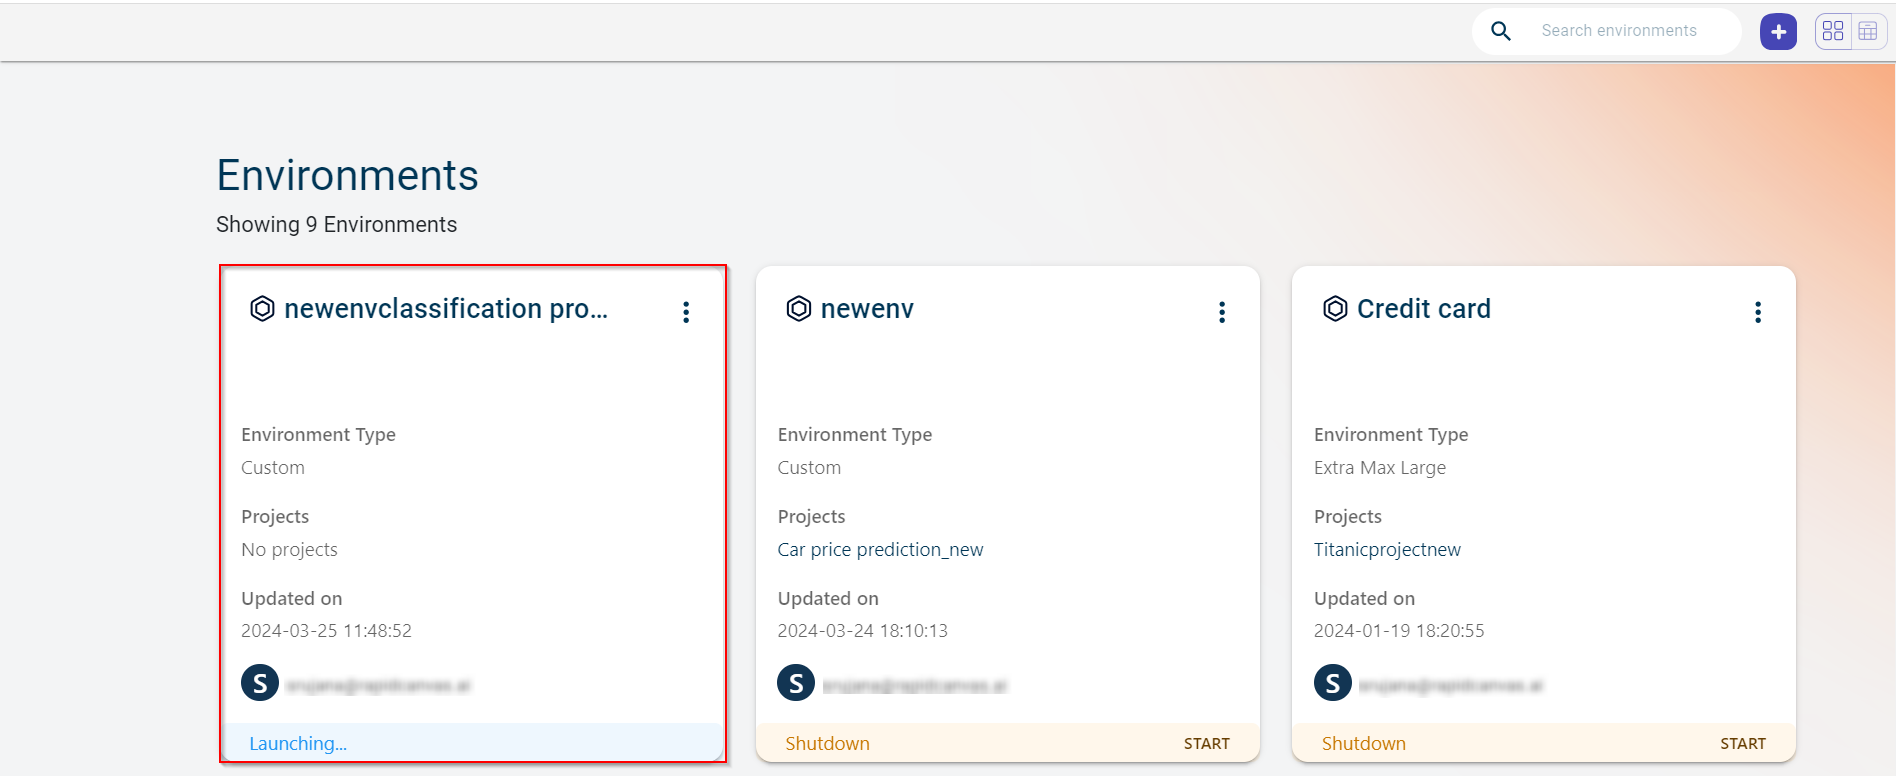
You can access all the environments from the environments dashboard. On the each environment card, you can see details such as environment type, projects in this environment, date on which the environment is created, and the user who created the environment. You can also see the status of the environment. The status of the environment changes
Different status you can see for an environment:
- Start:
Use this option to run the environment in the idle state. However, the environment starts automatically as you start working on projects in this environment.
- Running:
Indicates that the environment is currently active.
- Launching:
Indicates that the environment has started to use the hardware.
- Stop:
Use this option to stop the environment from running.
- Shutdown:
Indicates that the environment is shut down to save the cost.
- Failed:
Indicates that the environment has failed to start.
Various sections on the environment dashboard
This section explains various sections of the environments dashboard page:

Search: You can search for a specific environment by providing the name in the search box.

+: You can create a new environment. For more information, see Creating a new environment.

Switch from environments list view to card view: You can use this option to switch from list view to the card view.
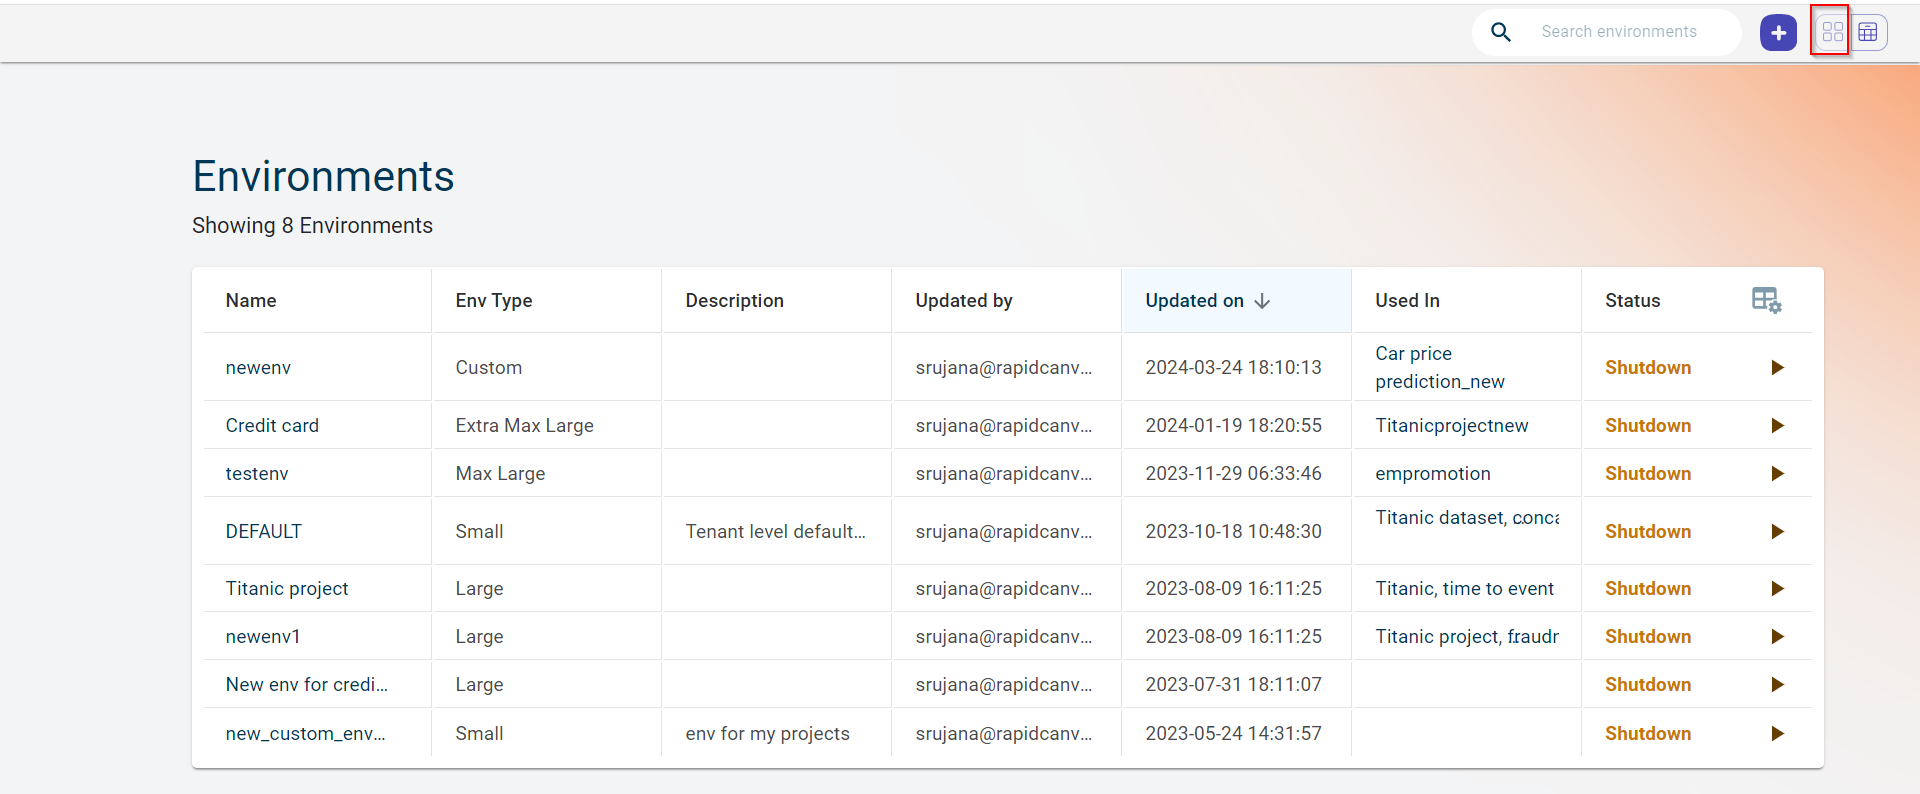
The card view of data sources appears as below:
Filters: You can filter the environment by type, such as Extra Small, Small, Medium, Large, CPU Large, Max Large, Extra Max Large, and Custom.
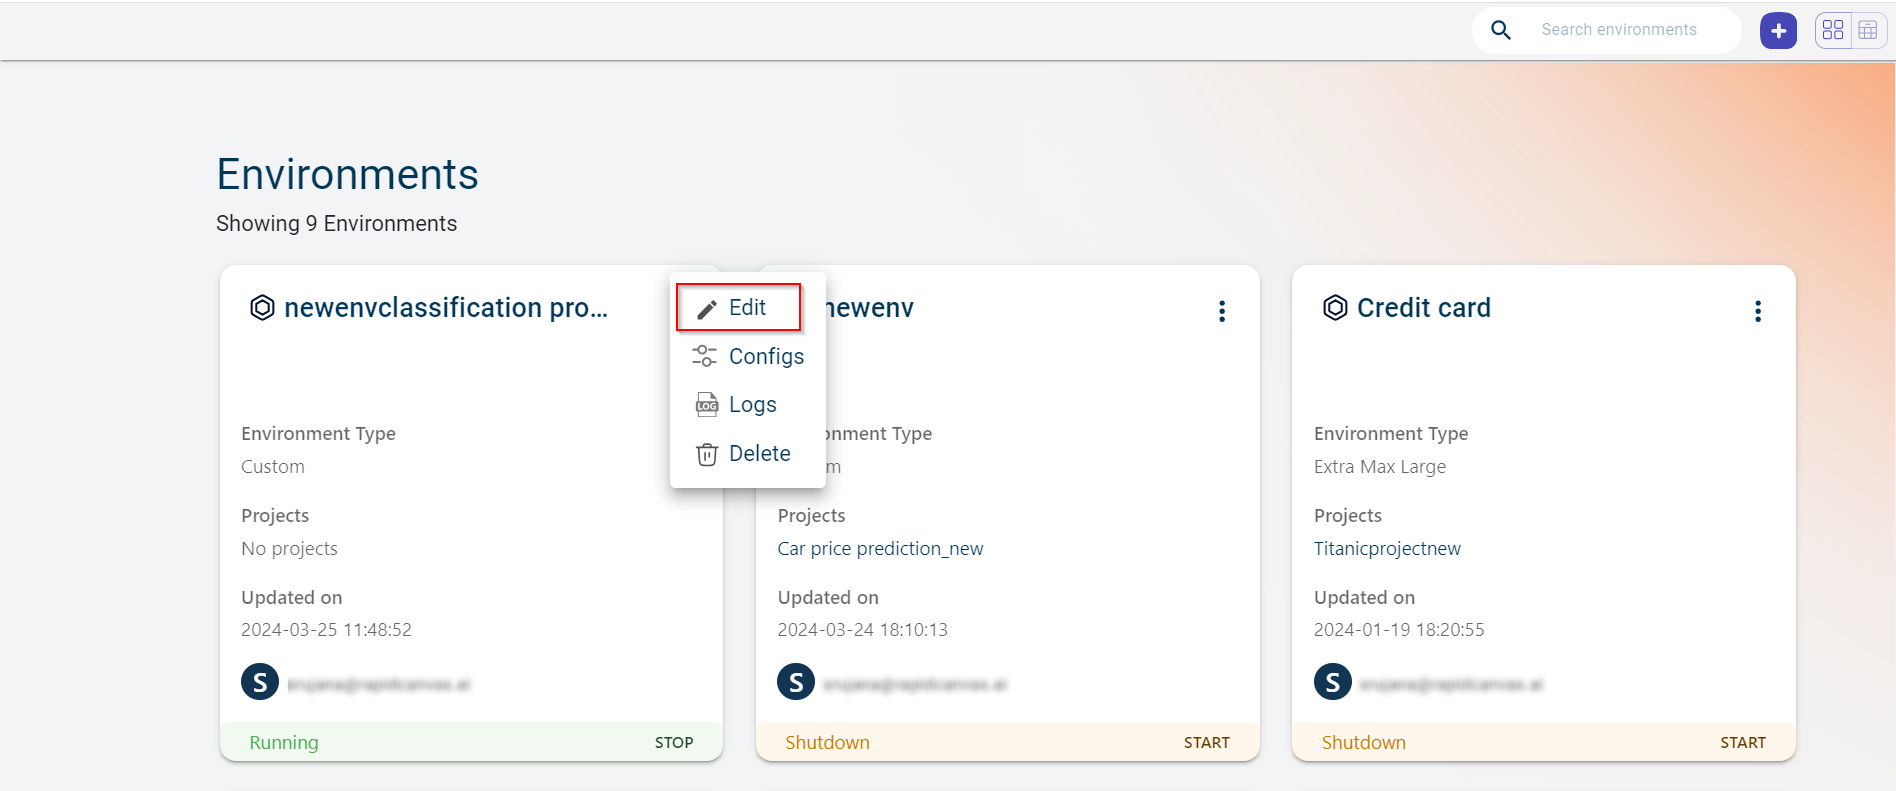
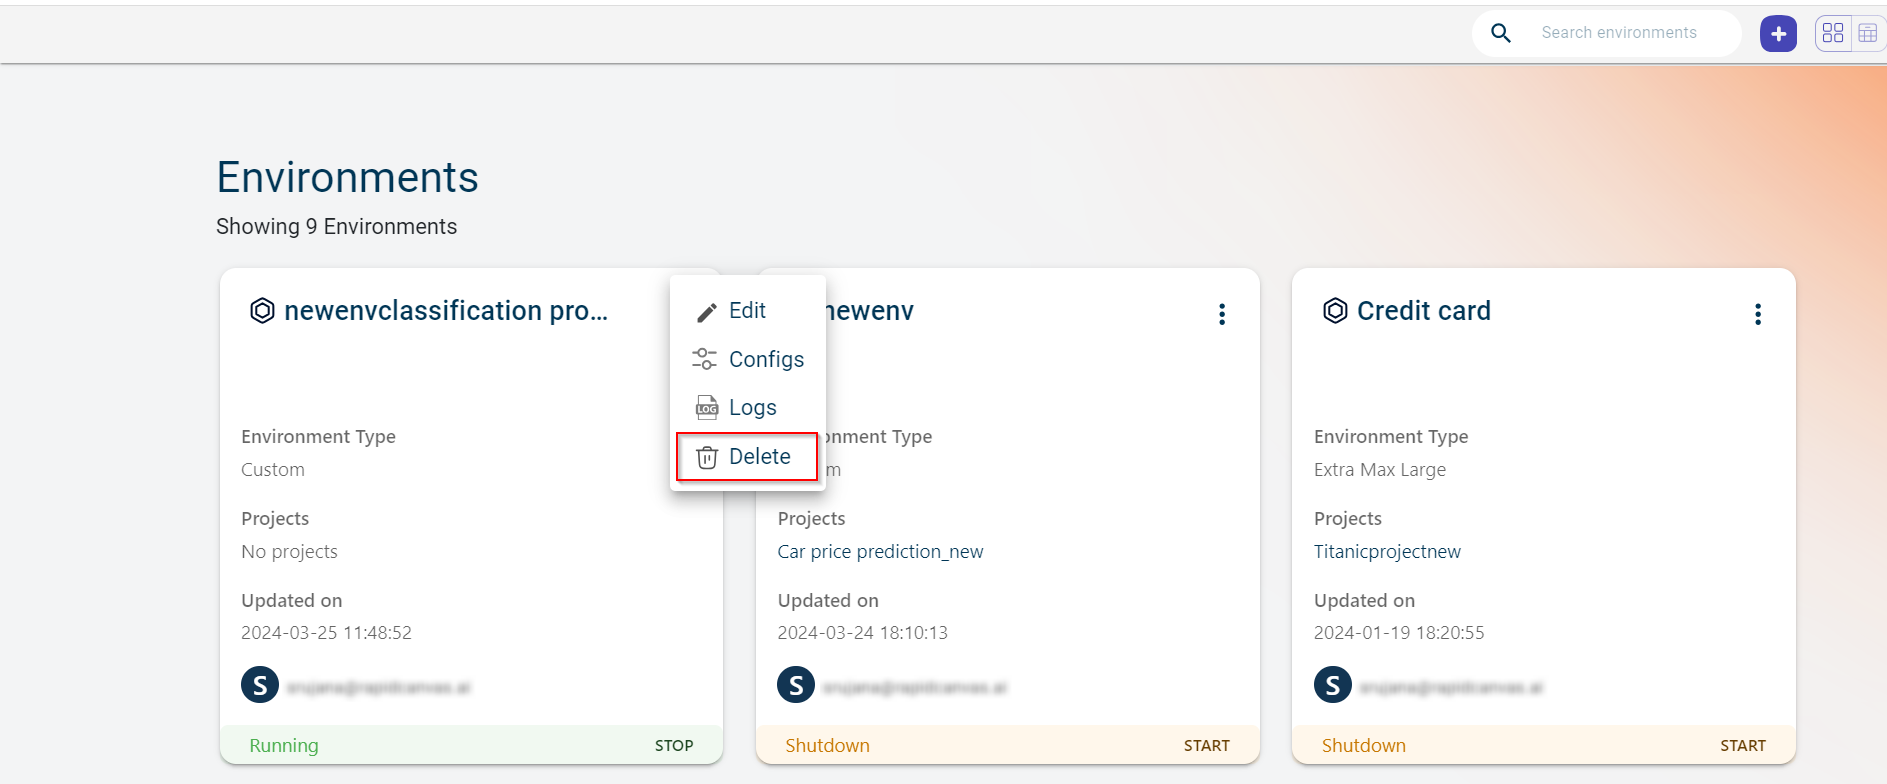
On the card view, click the ellipses icon to:
Modify the environmental details, using the Edit option.
Delete the environment, using the Delete option.
View the logs containing all activities in an environment, using the Logs option.
View the usage of resources (CPU and memory) by projects in an environment, using the Usage option. This option is only enabled if the environment is running.
Switch from projects card view to list view: You can use this option to switch from list view to the card view.
Creating an environment
Use this procedure to create an environment in which you can create and run the projects.
Hover-on the menu icon and select Environments.
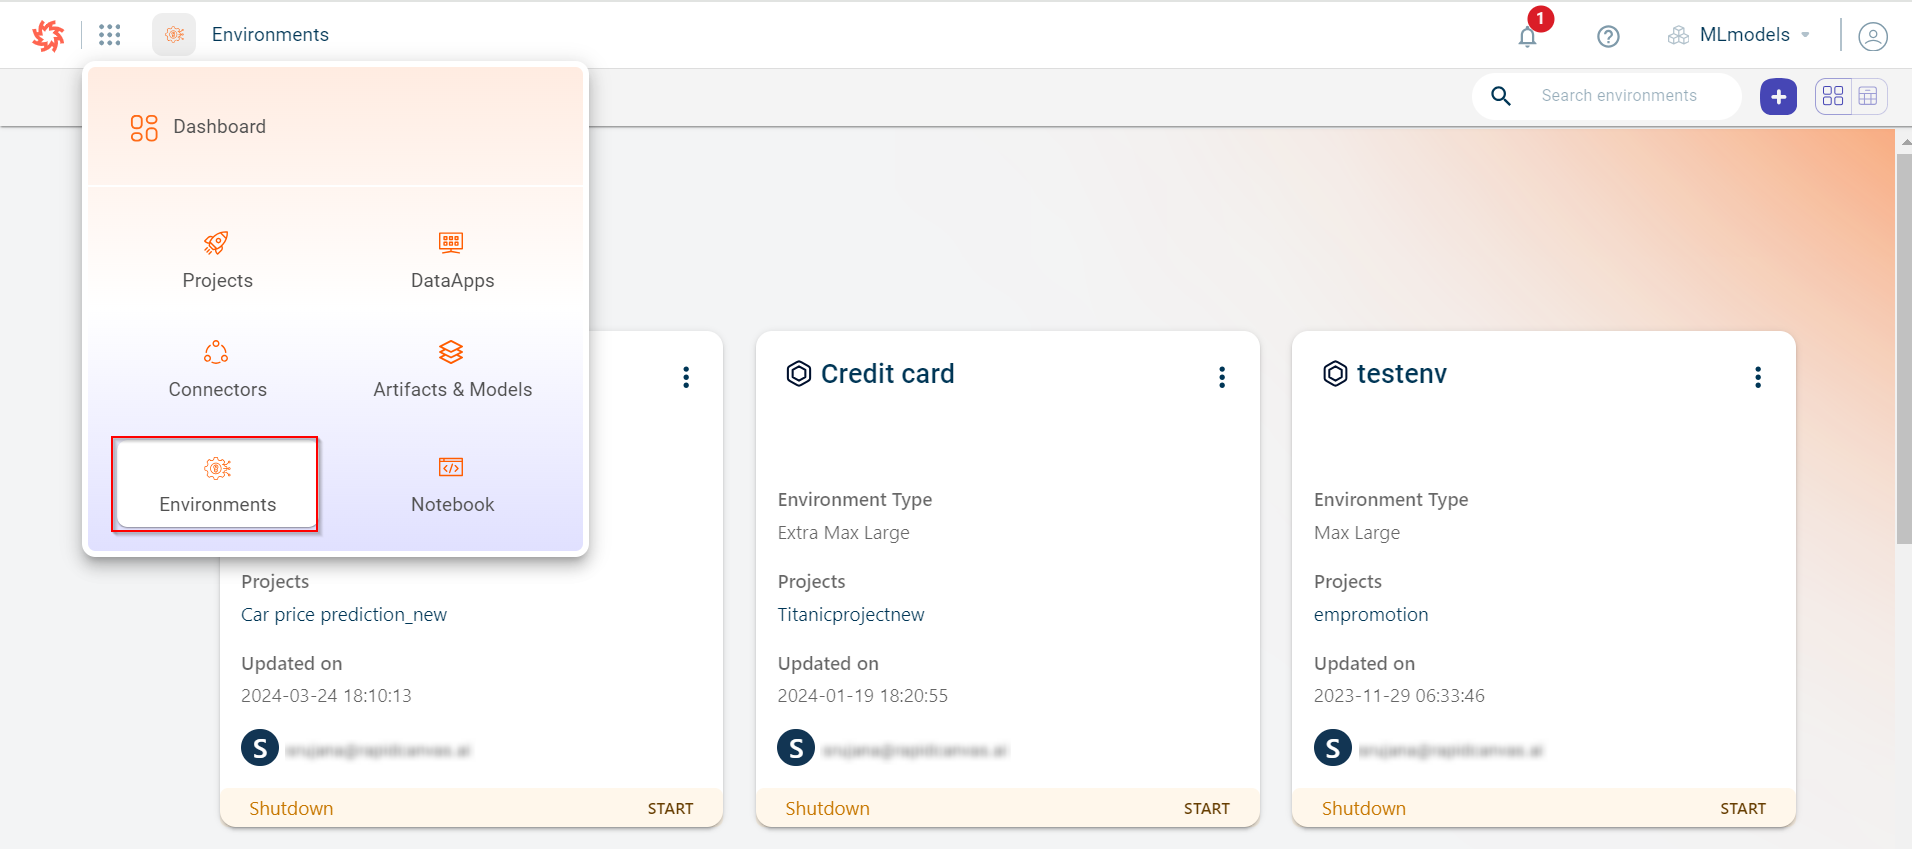
The environment dashboard (card view) is displayed.
Click the plus icon. The Create a new environment window appears.
Specify this information:
- Environment name:
The name of the environment.
- Environment description:
A brief description about the environment.
- Environment type:
The type of environment. Possible values:
EXTRA SMALL: 1 Core, 1GB Memory, and 5GB Disk Space
SMALL: 1 Core, 2GB Memory, and 20GB Disk Space
MEDIUM: 2 Cores, 4GB Memory, and 20GB Disk Space
LARGE: 4 Cores, 8GB Memory, and 20GB Disk Space
CPU_LARGE: 8 Cores, 16GB Memory, and 20GB Disk Space
MAX_LARGE: 12 Cores, 32GB Memory, and 20GB Disk Space
EXTRA_MAX_LARGE: 12 Cores, 48GB Memory, and 20GB Disk Space
CUSTOM: Select this option to configure the hardware requirements according to the project requirements.
- Cores:
The number of CPU cores reserved for this environment. This field is displayed only if you set the environment type to CUSTOM. You can provide the core values ranging from 1 to 12.
- Memory:
The memory allocated for the custom environment.This field is displayed only if you set the environment type to CUSTOM. You can provide the memory ranging from 1GB to 48GB.
- Disk space:
The disk space allocated for the custom environment. This field is displayed only if you set the environment type to CUSTOM. You can allot the disk space ranging from 1GB to 100GB.
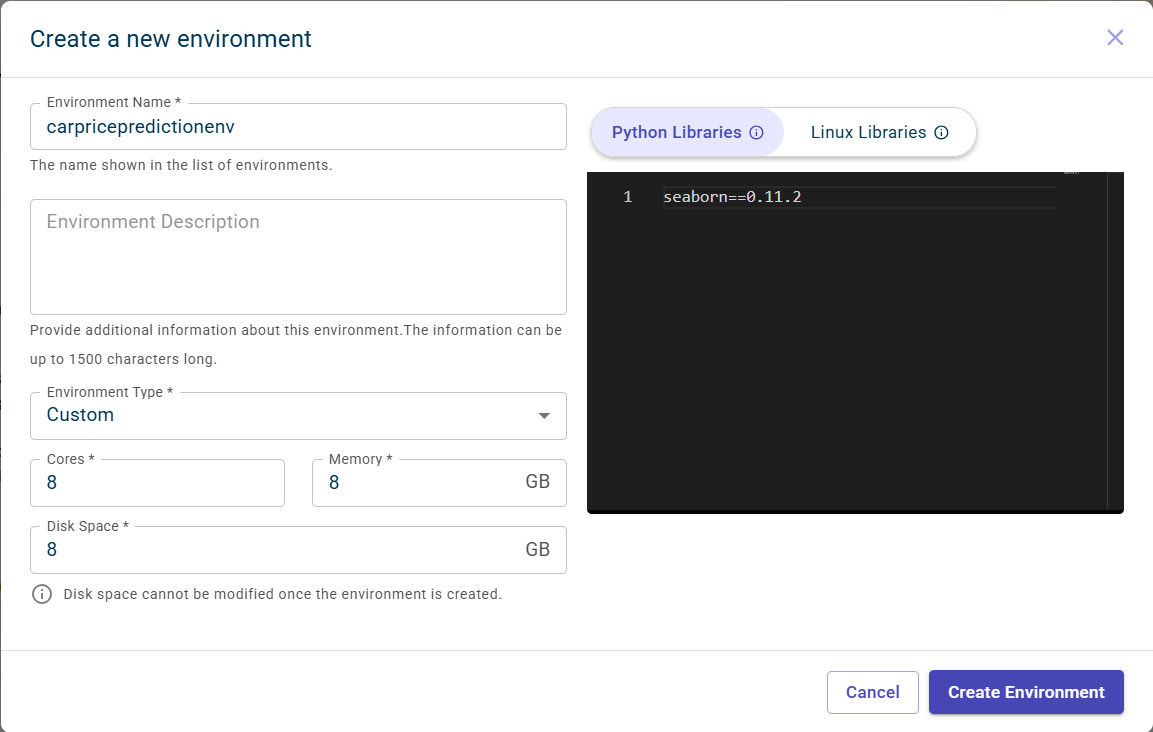
Specify the libraries you want to install in the Python Libraries and Linux Libraries tabs. You can add the Python libraries required for data transformations in the Python Libraries tab. In the Linux Libraries section, when the operating system is Linux with Python installed on top, certain libraries may not be supported by Python alone. In such cases, you can install Linux libraries to enable seamless use of Python libraries in the environment.
Click Create Environment. The created environment can be viewed on the Environments dashboard.
Editing the environment details
Use this procedure to modify the details of an environment. You can use the ellipsis icon in the card view to edit the details (or) the pencil icon corresponding to the environment you want to modify, in the list view.
Select an environment that you want to modify.
Click the ellipsis icon on the environment widget or card and select Edit.
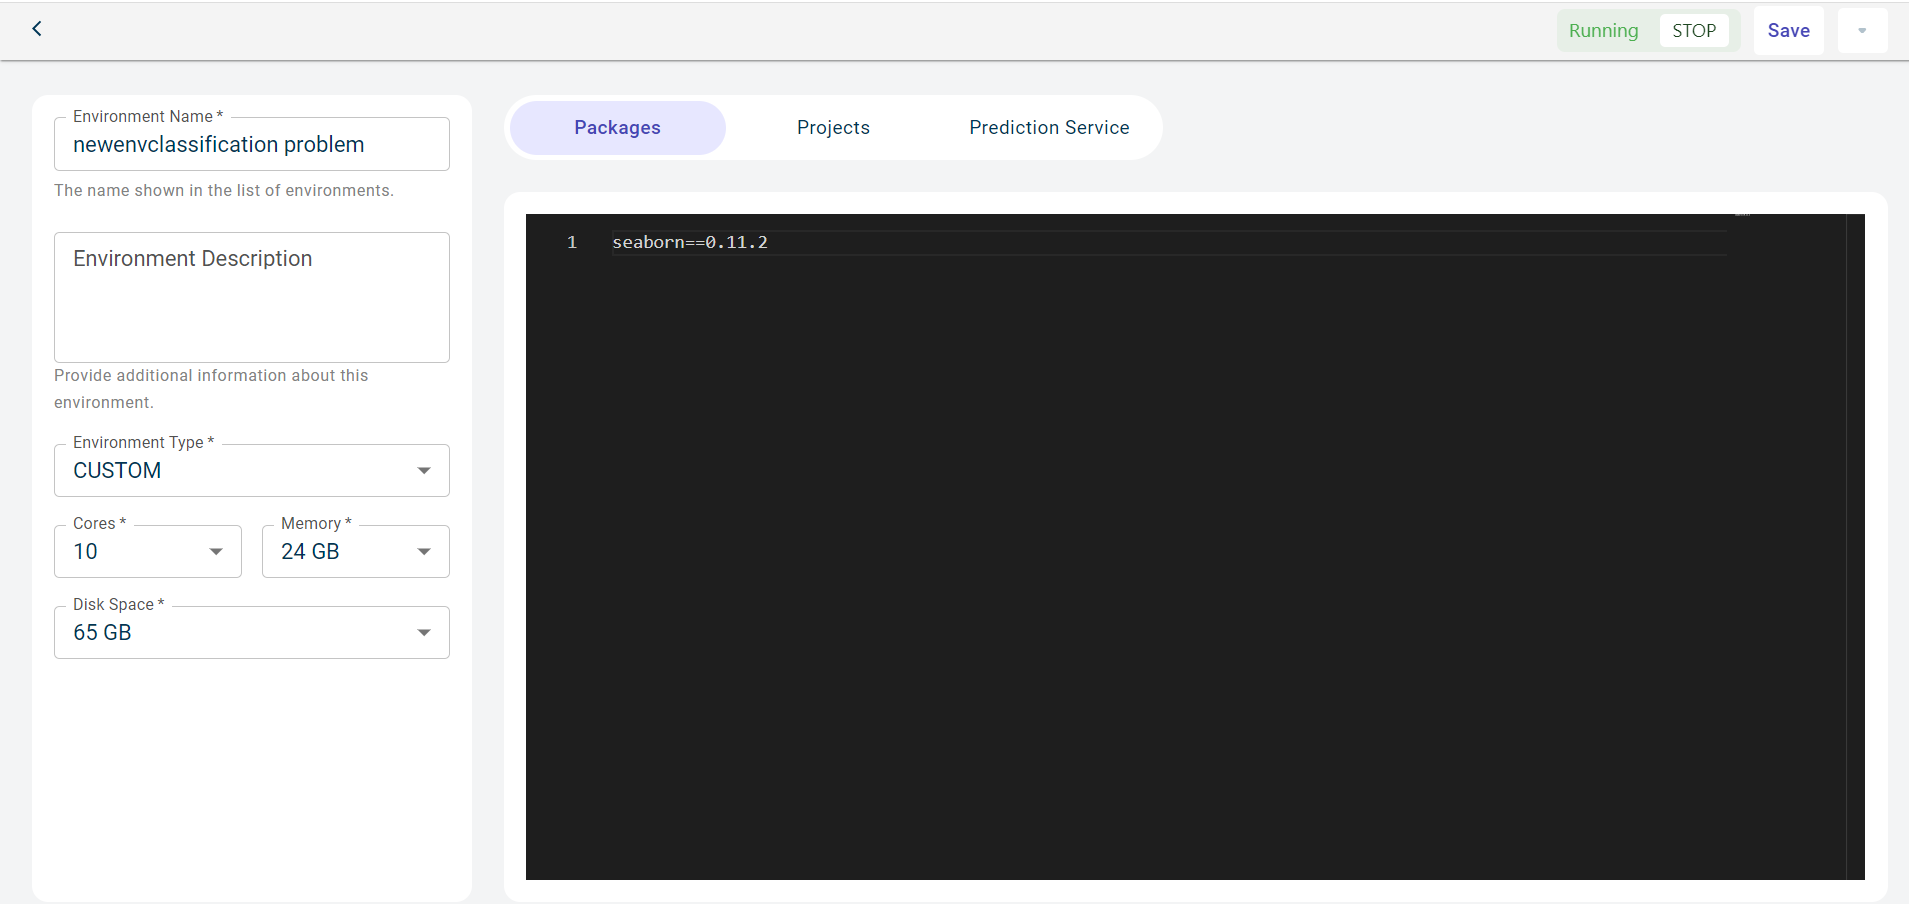
Modify the required details in the Environments page. You can also view the status of the environment on this page. If the status of the environment is running, you can use the STOP button to stop the environment.
On the Python Libraries and Linux Libraries tabs, you can add the new Python libraries and Linux libraries that can be used in the projects to run the recipes that need these packages.
If you want to install a specific version of the library, it should be in this format library_name==version. Example : seaborn==0.11.2, numpy==2.1.0 and so on.
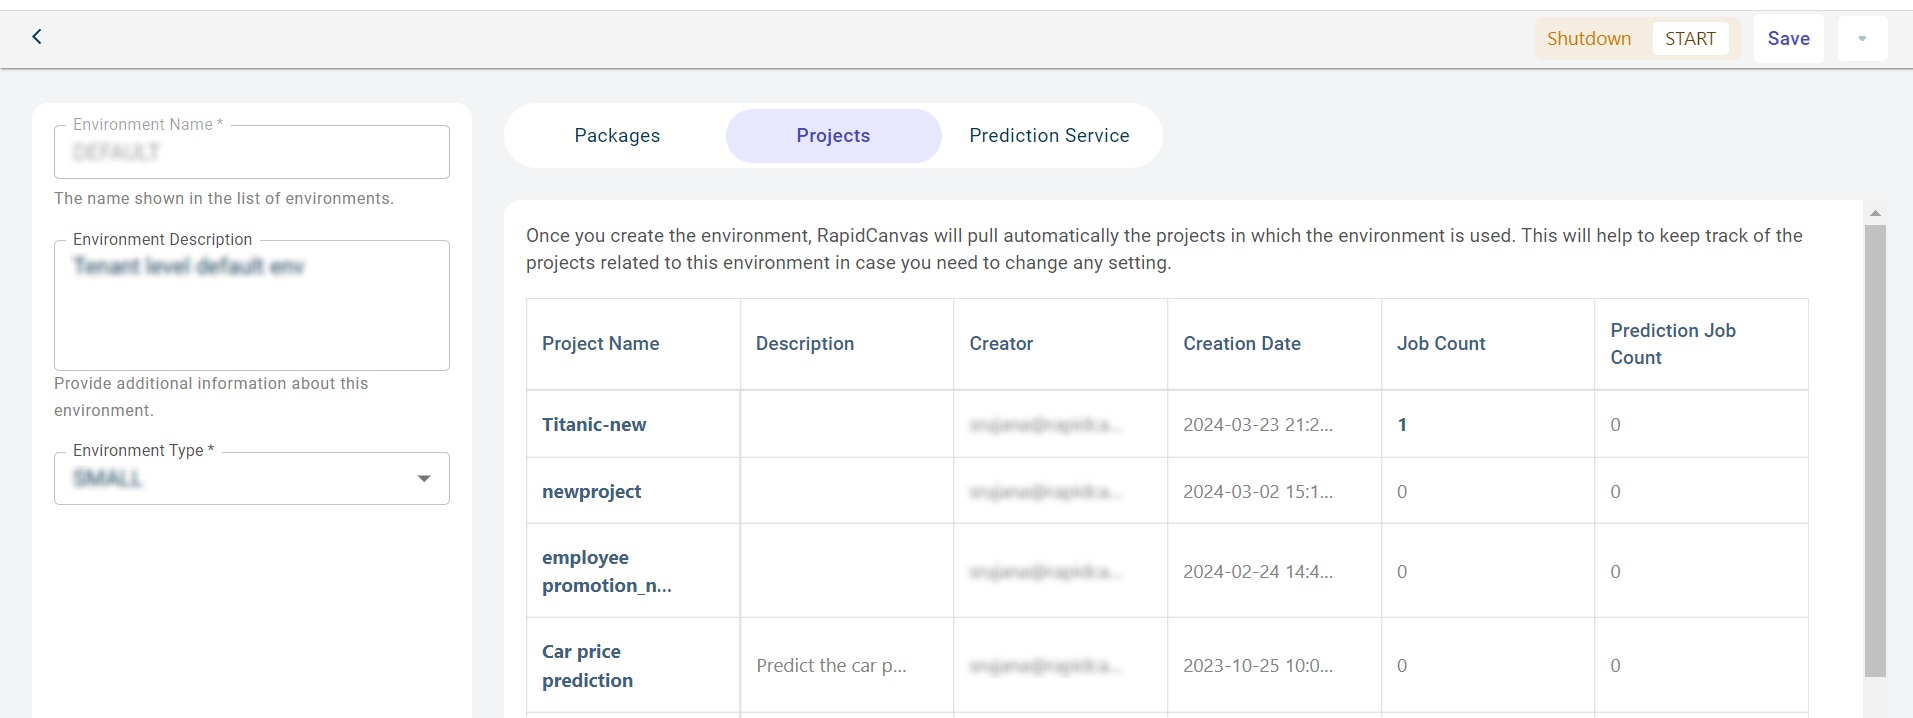
Click the Projects tab to see the list of projects used in this environment:
- Project Name:
The name of the project. Click on the project name to navigate to the canvas page of the project.
- Description:
The description of the project.
- Creator:
The user who created this project.
- Creation date:
The date on which the project is created.
- Scheduler Count:
This represents the number of schedulers associated with the project that used this environment. Clicking on the hyperlink will redirect you to the respective scheduler page for more details.
- Prediction Run Count:
The total number of prediction runs in which this environment has been used.
Click the Prediction Service tab to view the prediction services where the environment has been used to run these services:
- Name:
The name of the prediction service.
- Model:
The name of the output model.
- Creation Date:
The date on which the model was created.
- Creator:
The user who created the prediction service.
Click Save.
On this page, you can click the Caret icon to:
Delete the environment, using the Delete option.
Clear cache to save the space, using the Clear Cache option.
View the hardware utilization by projects running in an environment, using the Usage option. This button is disabled when the environment is shut down. You can only view the resource usage when the environment is running.
Check the logs and troubleshoot errors in the environment, using the Logs option. In the side panel, you can use the new tab option to open the logs in a new page.
Deleting an environment
Use this procedure to delete an environment created in a tenant.
Select the environment that you want to delete.
Click the ellipsis icon on the environment widget or card and select Delete.
A dialog box prompts to delete or cancel the environment. Click Delete to delete the environment permanently from the list.
Note
You cannot delete the environment that is used in projects.
Monitoring the resource utilization in an environment
Use this procedure to check how much memory and CPU have been used by projects running in an environment.
Select the environment to check its hardware utilization.
Click the ellipsis icon on the environment widget or card and select Configs.

This opens the Environment Usage window where you can check the memory and CPU usage in the environment and then use the resources efficiently.
Note
You can view the resource utilization of the environment that is running.
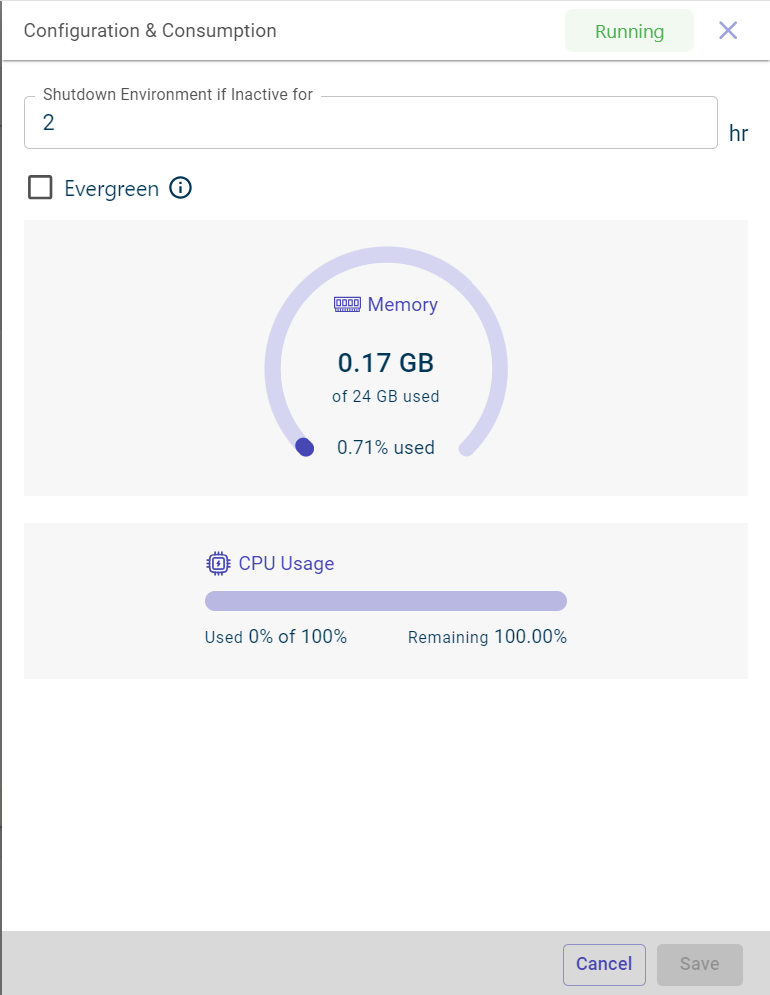
Set the time after which the environment must shutdown. The time is expressed in hrs.
Select the Evergreen check box to keep the custom environment running always.
Click Save to update the changes.