Accessing the platform
RapidCanvas platform enables you to build simple to complex machine learning models using an intuitive graphical interface. You can create projects, run recipes, and train and test machine learning models for different use cases. RapidCanvas enables you to execute a sequence of steps required to build machine learning models.
This section guides you through the process to successfully access the RC platform
Browsers supported
The platform supports all latest versions of Google Chrome and Microsoft Edge.
SSO overview
Single Sign-On (SSO) streamlines the login experience, allowing users to authenticate once and gain access to multiple applications without re-entering credentials for each app. By logging in to any SSO-enabled application, users are automatically granted access to other applications linked by the service provider.
How SSO Works in RapidCanvas
When a user attempts to sign in, the system verifies the provided email address to determine if SSO is enabled for the user’s domain.
If SSO is enabled:
The user is seamlessly redirected to their SSO provider’s login page for secure authentication.
If SSO is not enabled:
The system guides the user through the standard login process.
This ensures a smooth and efficient login experience, adapting based on the user’s domain settings.
Flexibility for Workspaces
SSO is activated at the system level, providing centralized control over login processes. However, individual workspaces can choose to enable SSO specifically for their users, offering flexibility in authentication options.
Hybrid Mode Support in RapidCanvas
RapidCanvas supports a hybrid mode for login, accommodating both RapidCanvas and client users:
For emails matching a company domain:
The user is automatically redirected to the SSO login page, ensuring a seamless SSO-enabled experience.
For certain other email domains:
The user is directed to the standard login page, bypassing SSO entirely for convenience.
Signing up to the RC platform as a new user
Admin can send an invitation email to request users to join the platform. Once an invitation email is received, users can sign up to the platform.
To access the platform as a new user, you must follow these steps:
Click the Sign Up button provided in the invitation email. This takes to the sign up page.
Provide the email address in the Email field.
Provide the password and confirm password in the respective fields.
Select the By signing up you agree to our Terms of Service check box to agree to the terms and conditions. Only selecting this check box enables the Sign up button.
Click Sign Up to start using the platform.
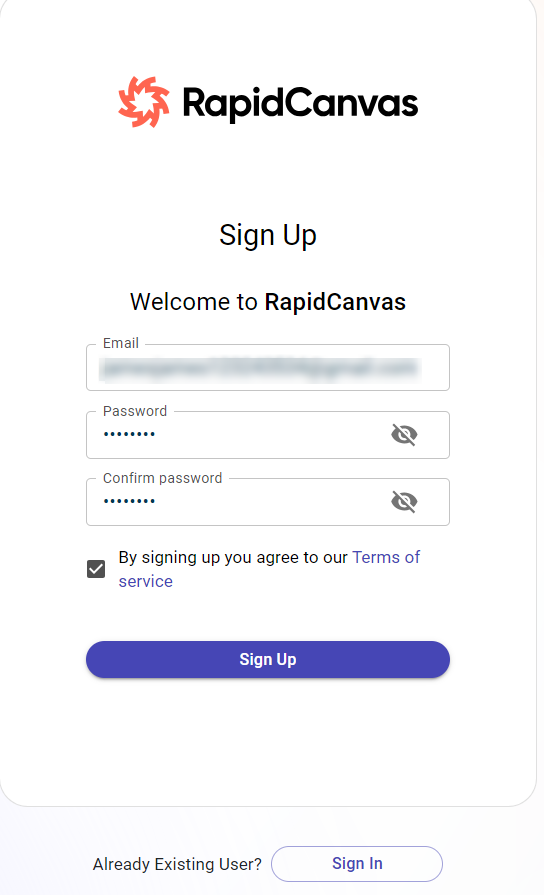
If you are an existing user, click Sign In. For more information, see Signing in to the platform as an existing user.
Signing in to the platform as an SSO user
If Single Sign-On (SSO) is enabled for your workspace, you can seamlessly log in using your organization’s credentials. Follow the steps below to complete the sign-in process.
Click the Sign up button provided in the invitation email. This takes to the sign up page.
Provide the email address in the E-mail address field.
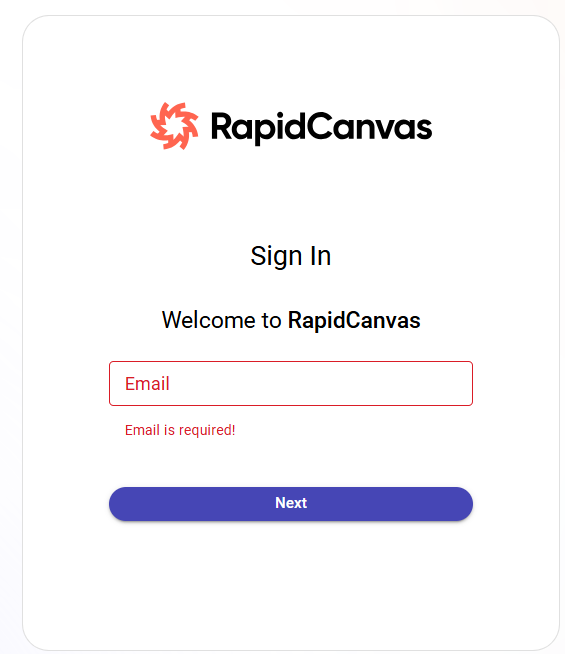
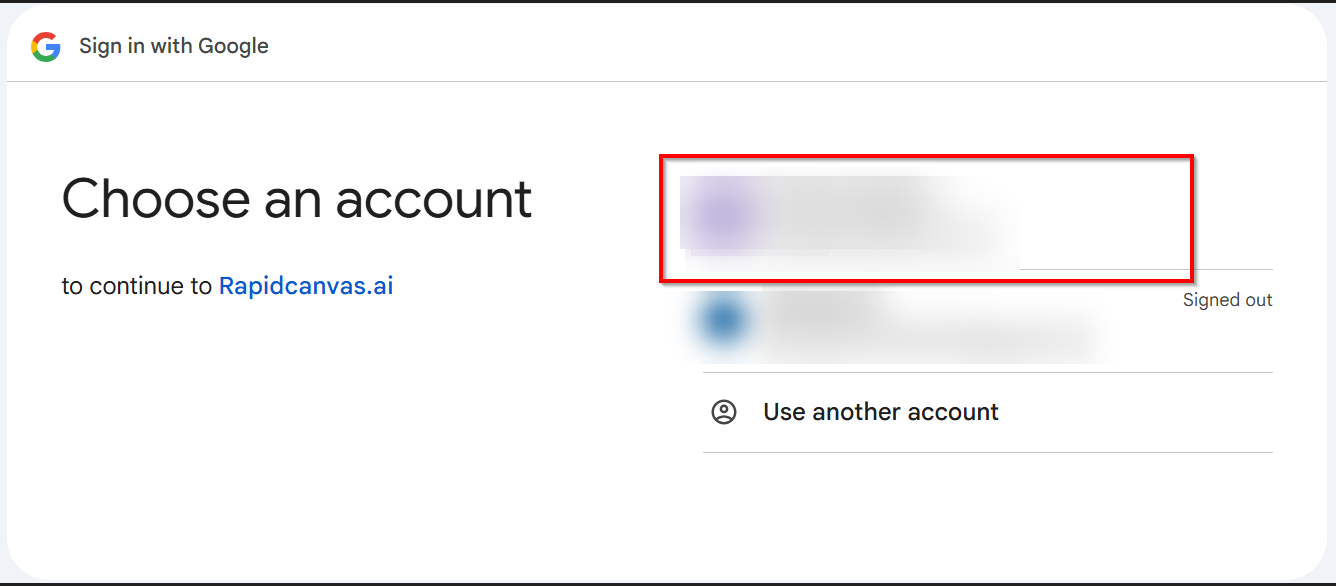
You are redirected to the SSO service provider’s page. In this example, it is Google. 3. Select the account with which you want to login to the platform.
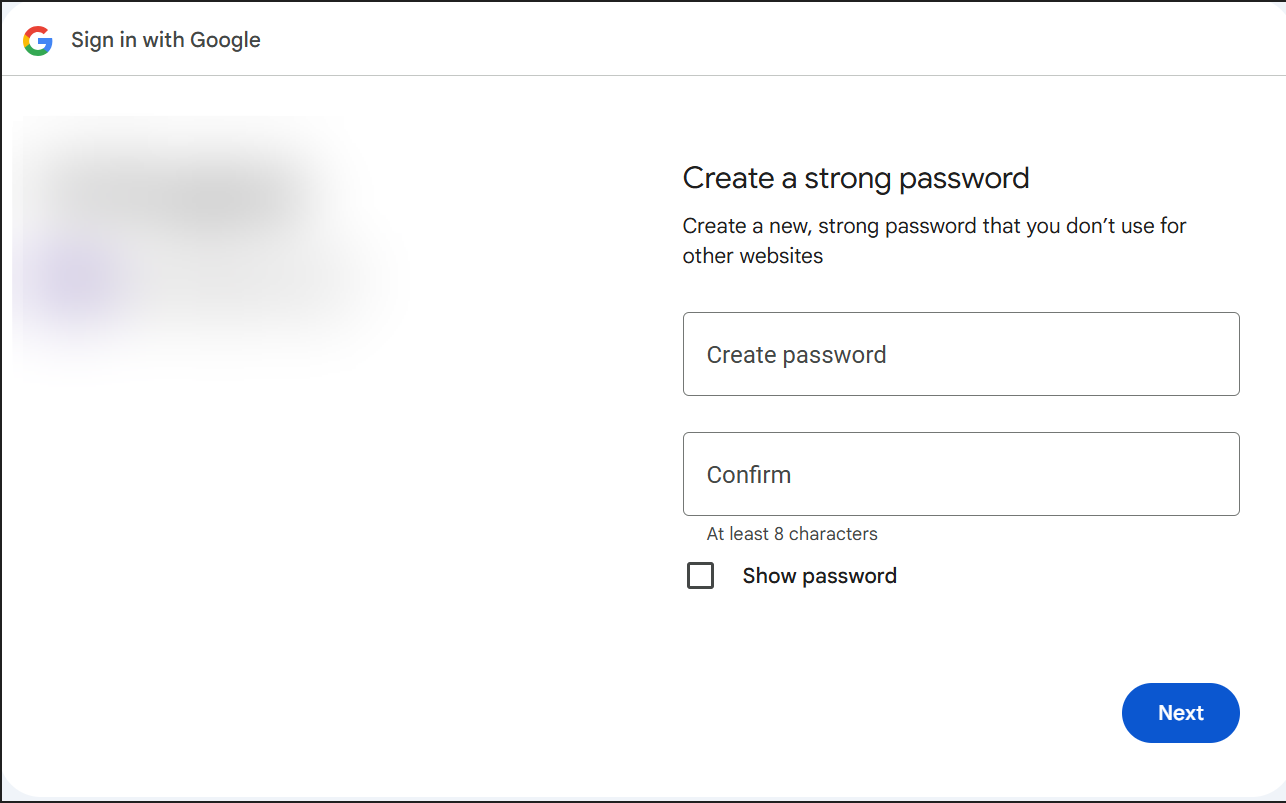
This redirects you to the password page.
Enter the password and confirm password in the respective fields and click Next.
Click Continue to land on the platform.
Signing in to the platform as an existing user
To access the platform as an existing user:
Enter the application URL - https://staging.dev.rapidcanvas.net
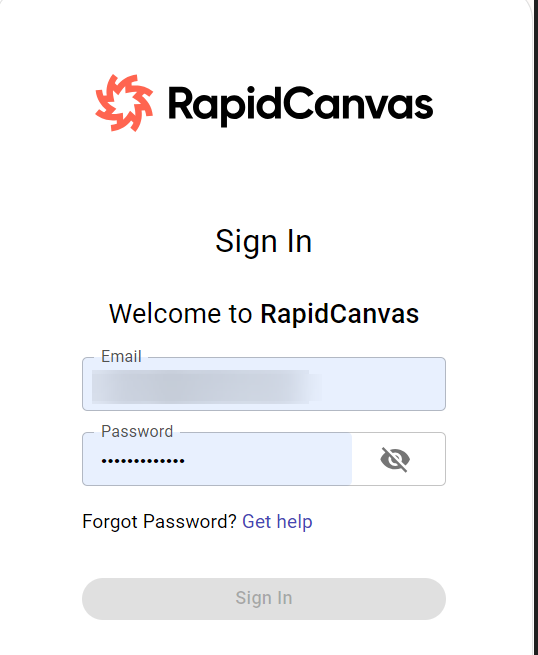
Enter the Email address and Password in the respective fields.
Click Sign In to access the RapidCanvas application.
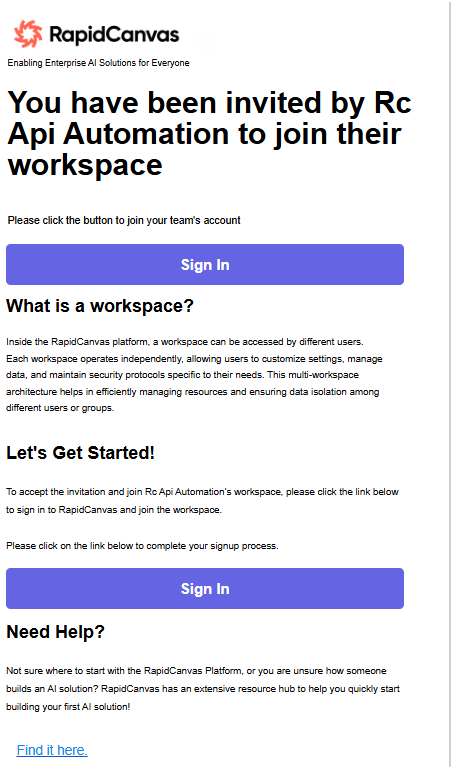
Joining a workspace
An existing user is invited to join a new workspace through an invitation email. A user can have access to multiple workspaces. The user can also accept the invite to join a new workspace from the Profile settings page.
You can join the workspace using either way:
To join a new workspace in a specific environment through invitation:
Click the Sign in button embedded in the invitation email.
Note
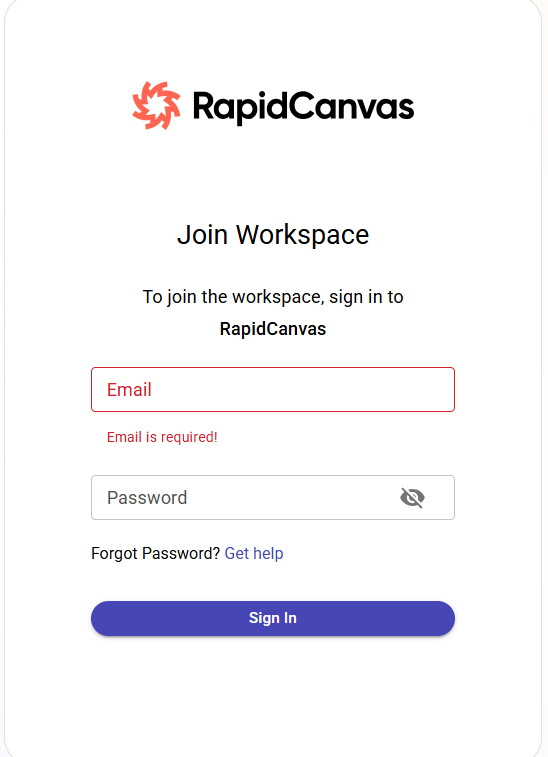
Upon clicking the Join Workspace button, you will be redirected to the dashboard page of this workspace only if your login session is active.
Provide the valid credentials with which you sign in to the platform to join the workspace. After logging in successfully, you are redirected to the new Workspace dashboard.
To join a new tenant through Profile settings:
Log in to the platform.
Select the User Profile on the top right-corner of the dashboard and select Settings. This displays the Profile page.
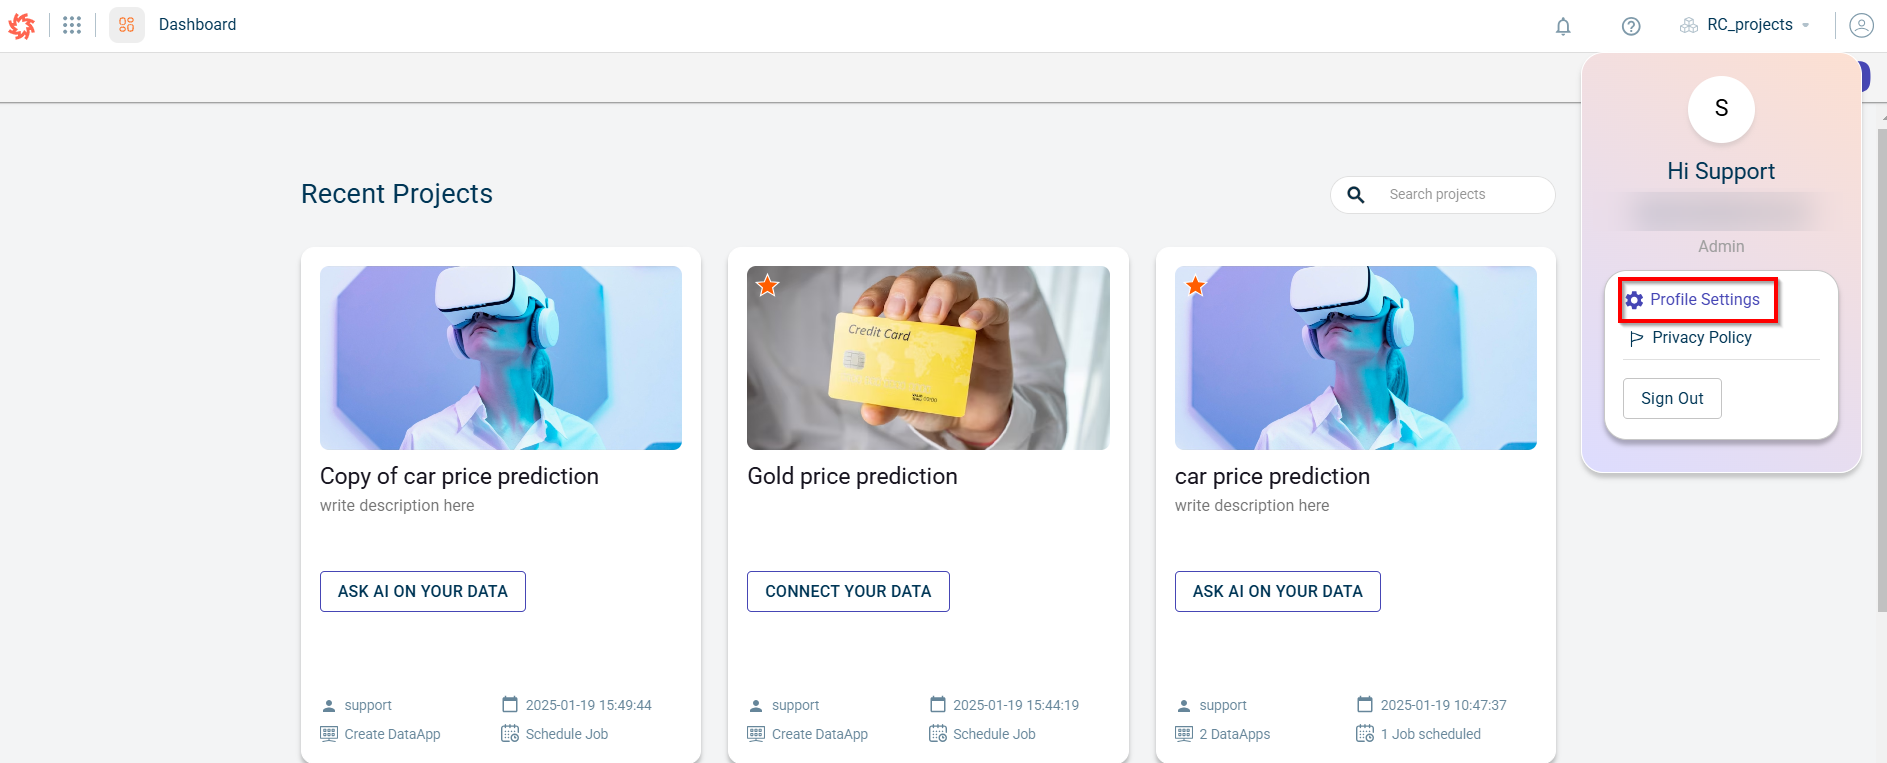
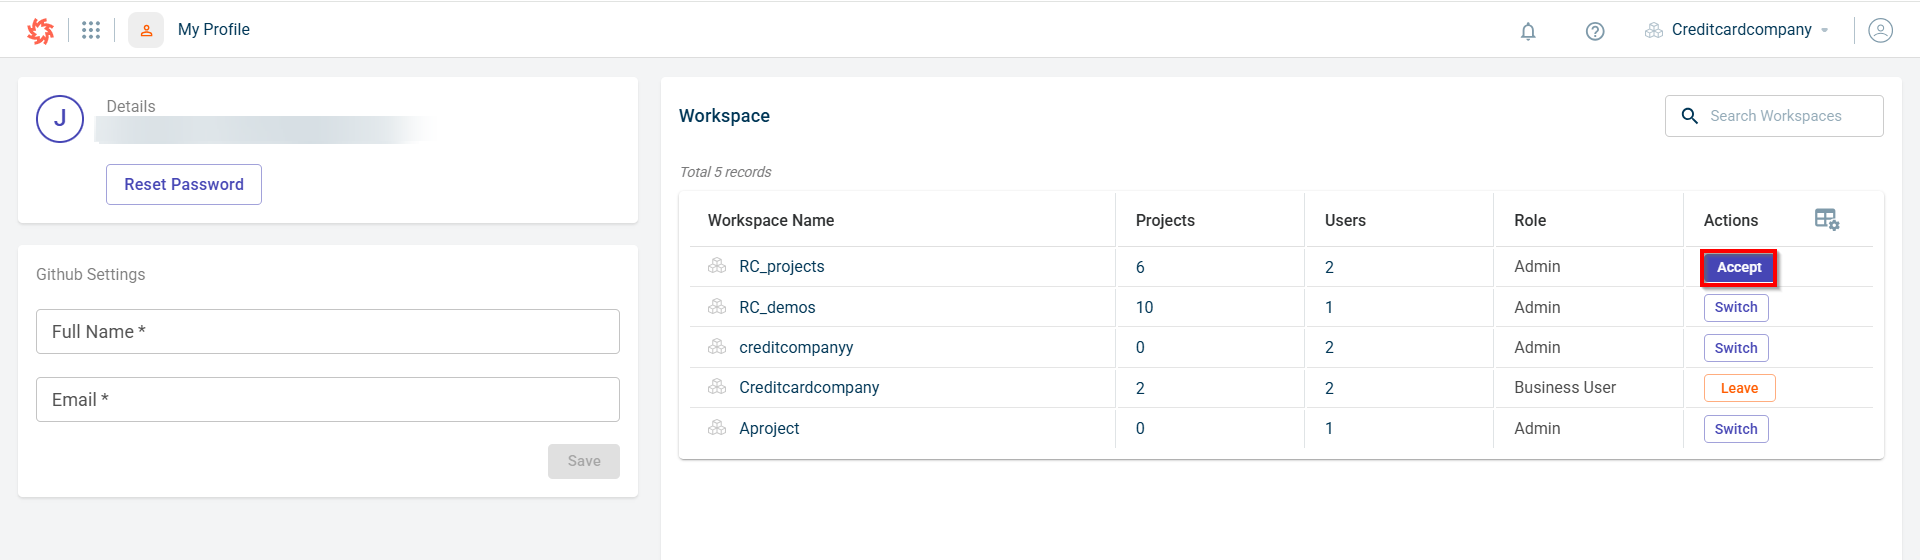
Click Accept corresponding to the workspace from which you received the invitation to join. Accepting the invite makes this your current workspace in an instance.
Resetting the password
If you do not remember the password to login to the application, you can reset the password.
To reset the password:
Click the Get help link corresponding to the Forgot your password text on the Sign up page. The Reset password page appears.
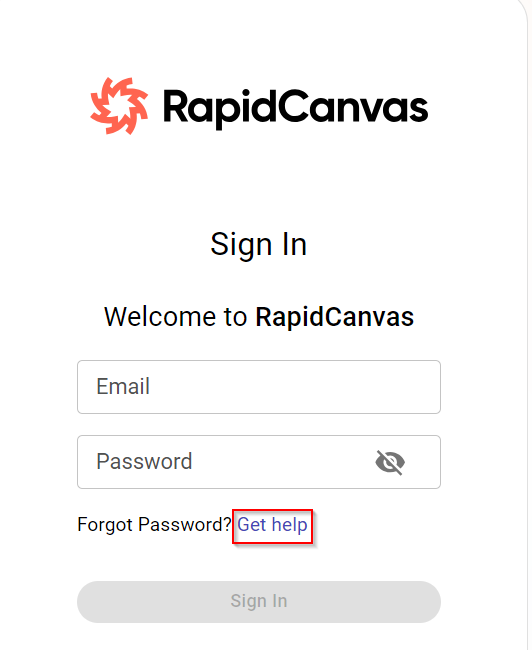
Enter the email address.
Click Get a Reset Link. The password reset link is sent to the provided email address with the link to reset.
Click the Reset password hyperlink in the email. This redirects to the Reset password page.
5. Provide the Password in the Password field and the Confirm password field. .. note:: The email address you provided is defaulted in the Email address field and cannot be edited. 6. Click Reset Password to successfully change the password of your account. You can now use the new password to access the RC platform.
Configuring Github settings on the platform
Use this procedure to configure your Github settings on the platform. When you perform any Github actions on the Notebook, such as clone, push, or pull after configuring the Github settings on the platform you are prompted to provide the Github username and password (personal access token) only once for authentication. These credentials are stored and you do not have to provide the Github credentials whenever you perform any Github action on the Notebook opened from the platform.
To configure Github settings on the platform:
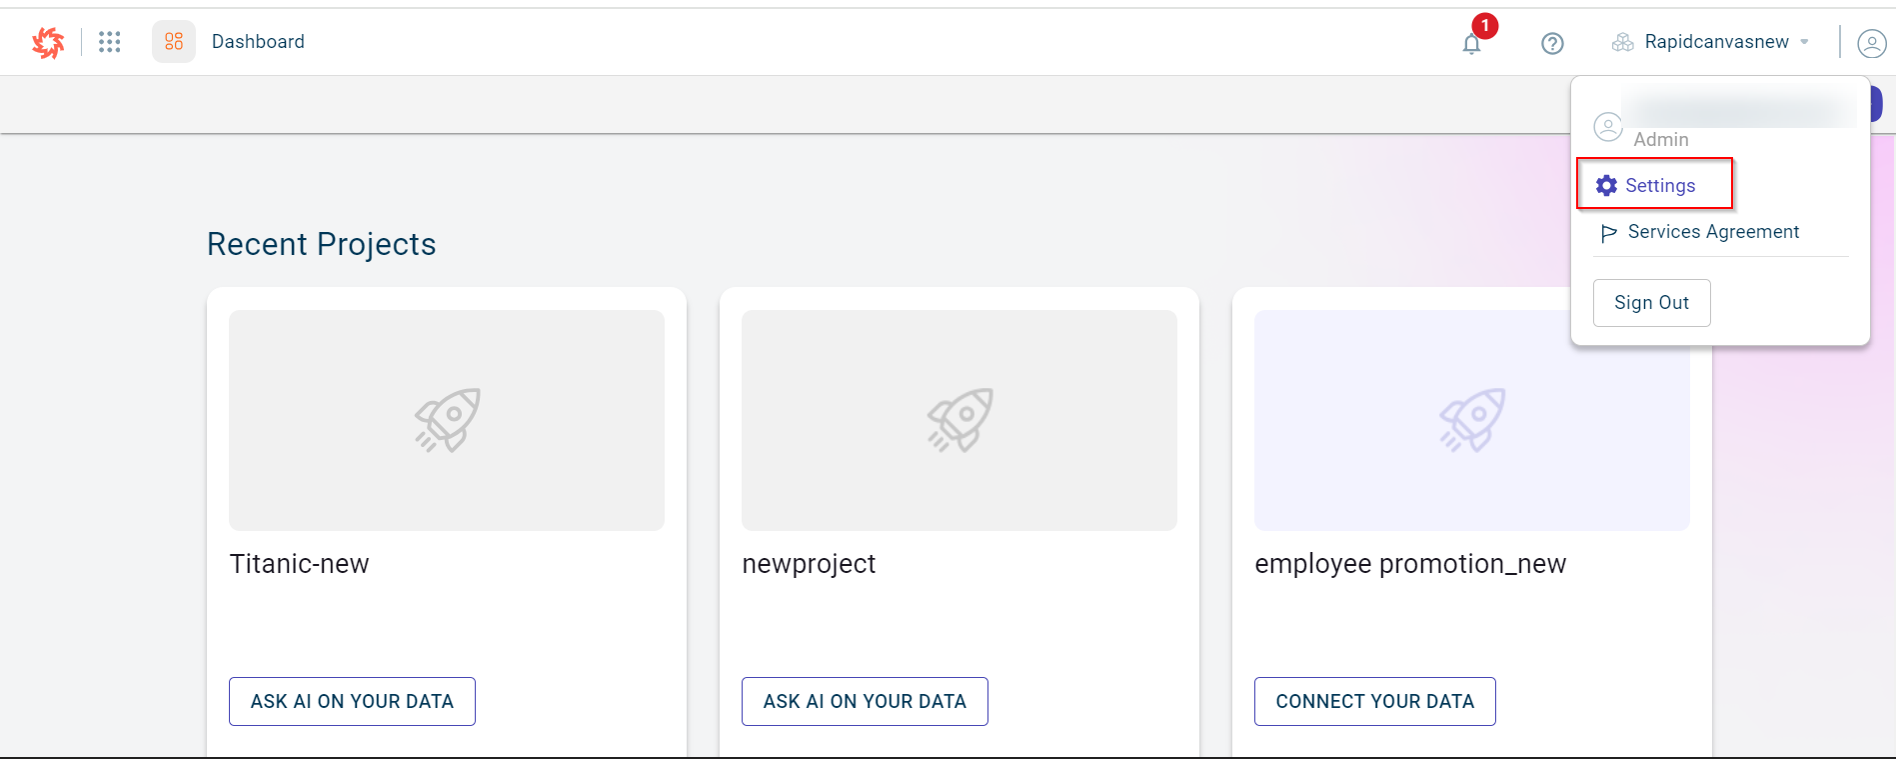
Log in with valid credentials. The dashboard page appears.
Click the Profile icon on the top right-corner of the dashboard.
Select Settings. This opens the Profile page.
Provide the full name and email address of your Github account, in the Github Settings section.

Click Save to save the Github settings.
Launch the Notebook from the platform after saving the Github settings on the platform.
Click the Git option from the left side options in the Notebook editor.
Click Clone a Repository on the Notebook.
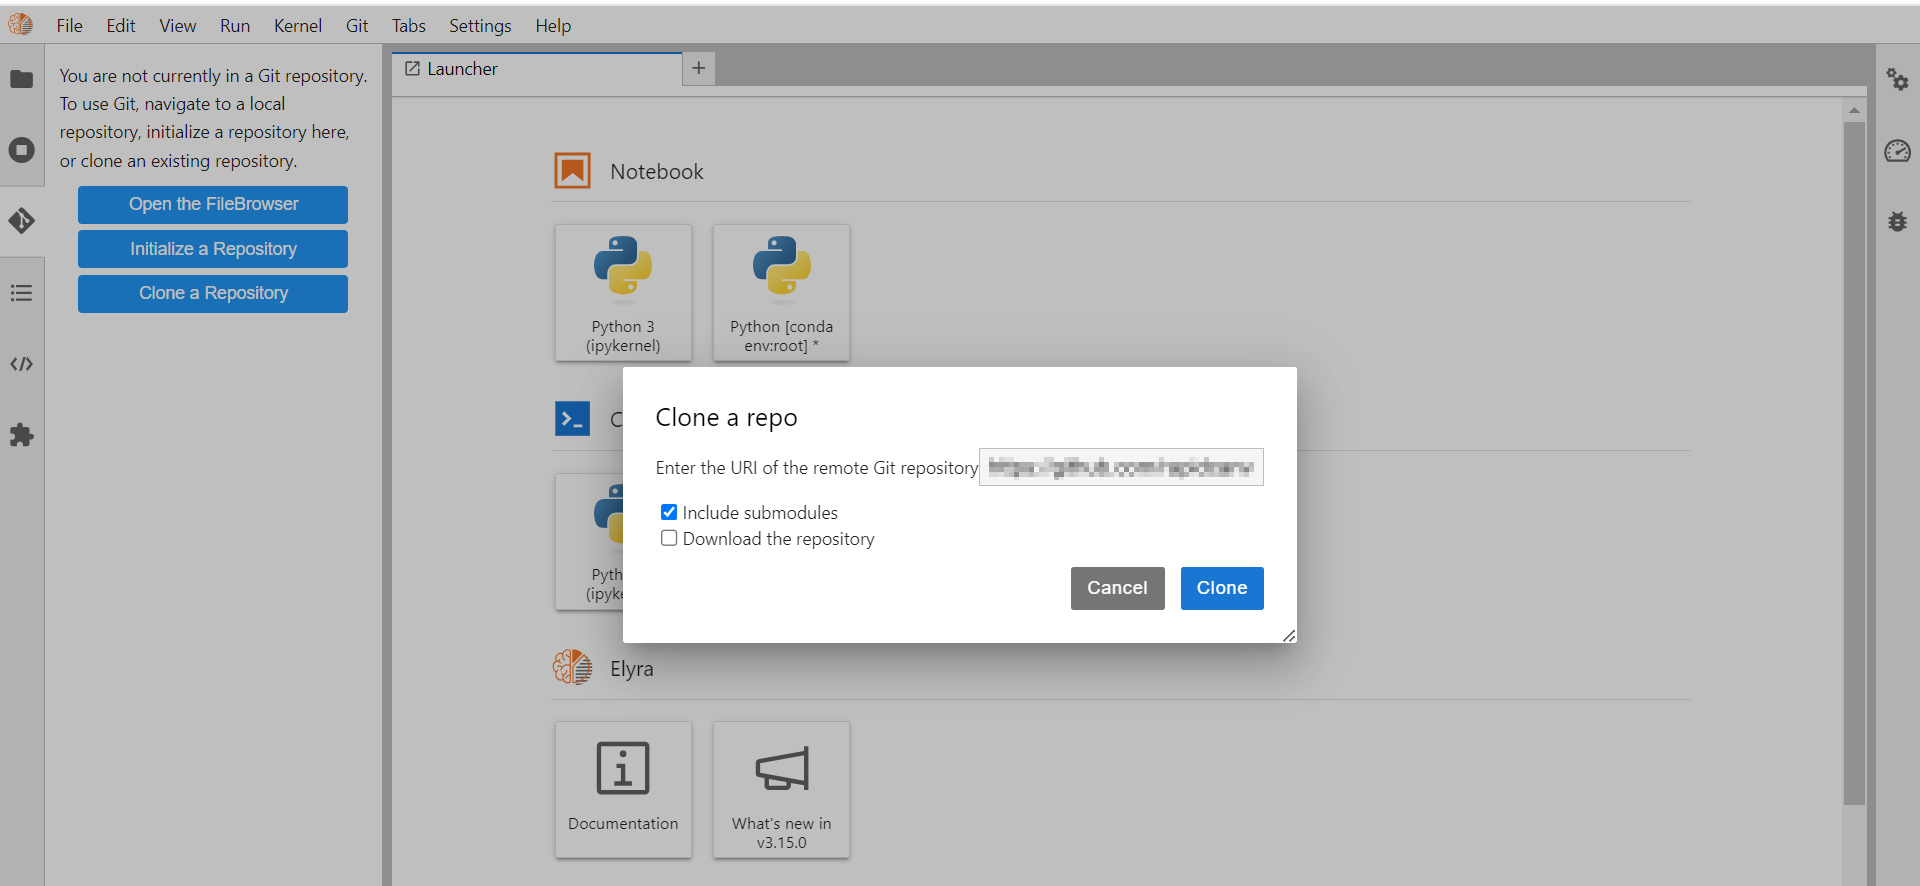
Provide the URI of the repository you want to clone onto the Notebook.
Click Clone. This displays the Git credentials required dialog.
Provide the username and password (personal access token) of your Github account in the respective fields.
Note
You must generate the personal access token and use this as the password to access the Github account.
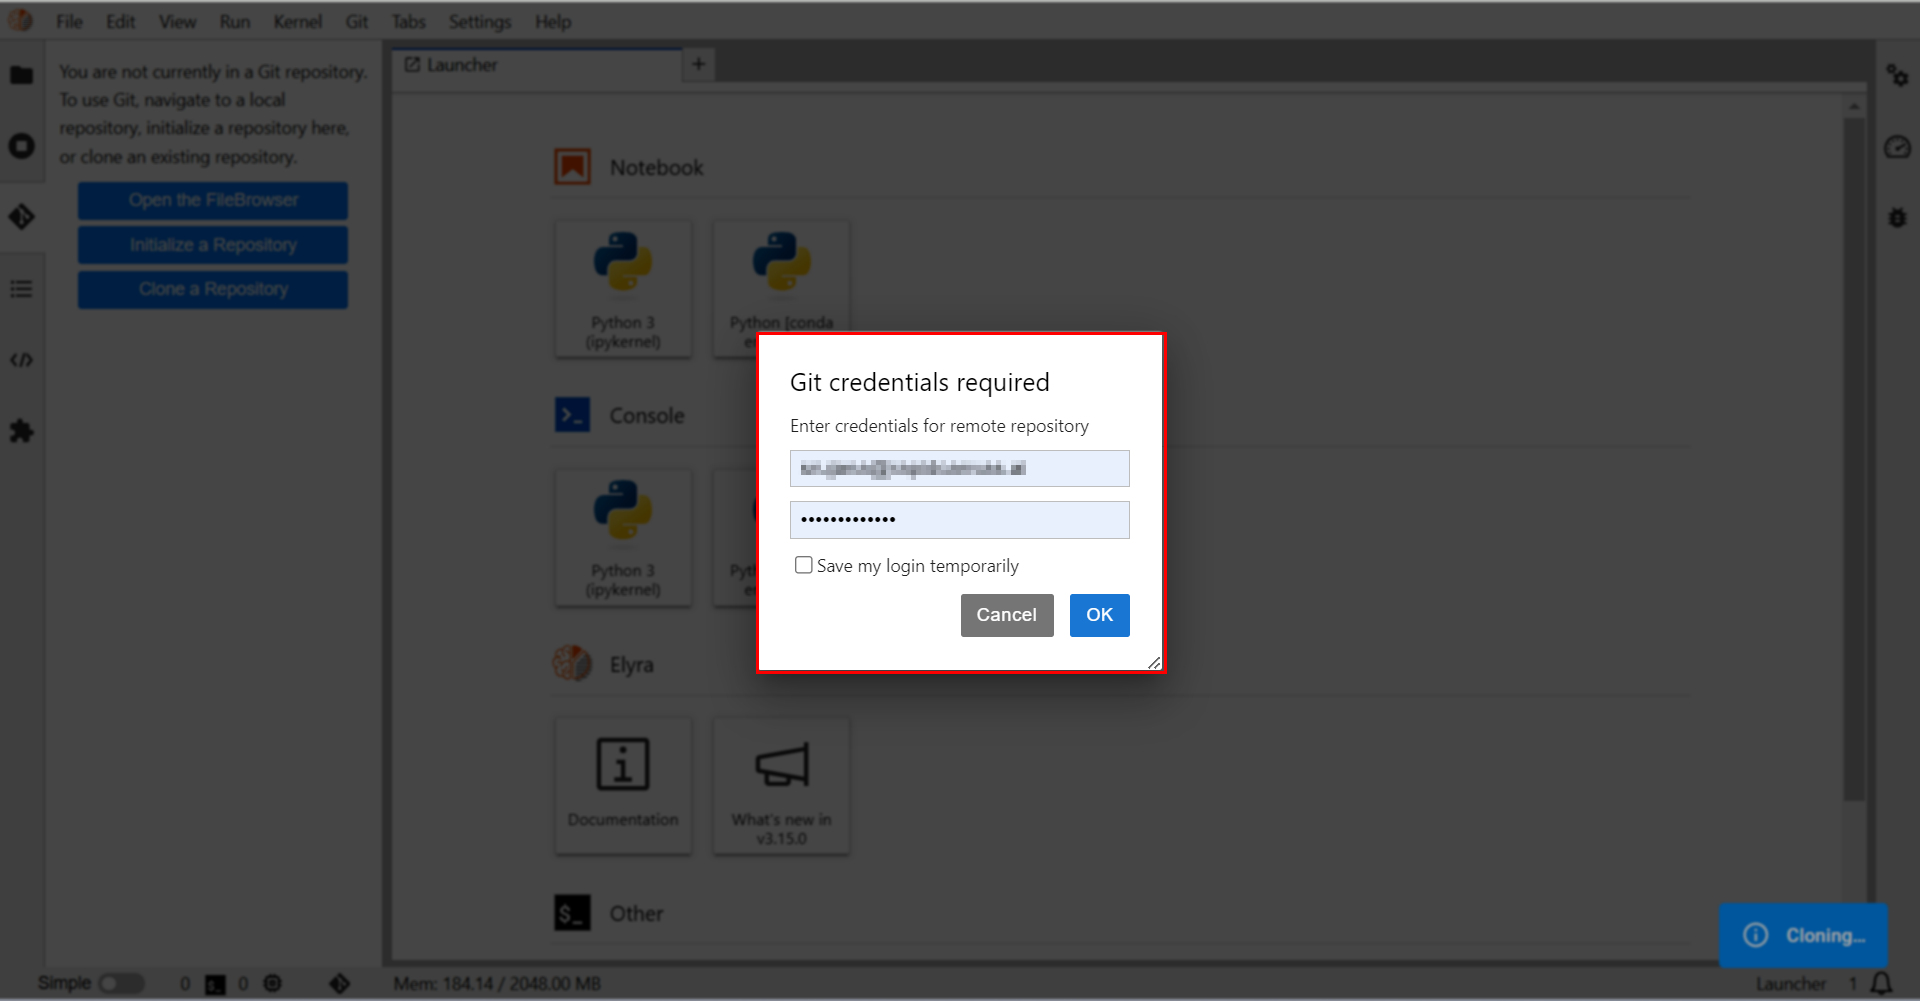
Click OK.
Changing the password after signing in to the platform
You can change the password for security reasons from time to time and this can done after you login to the platform.
To change the password:
Log in with valid credentials. The dashboard page appears.
Click the Profile icon on the top right-corner of the dashboard.
Select Settings. This opens the Profile page.
Click Reset Password. A dialog box is displayed.
Click OK. An invitation is sent to your email with the link to change or reset the password.
Signing out
You can end the session on the platform by signing out.
To sign out from the workspace:
Click the user icon on the top right corner of the dashboard.
Select Sign Out.
Platform landing page
After you sign in to RC platform, you are redirected to the dashboard page. From this page, you can access the following components:
Dashboard
Dashboard view is the landing page of any workspace and shows the recent set of projects and solutions which are accessed as part of the workspace
Note
To access any module on the platform, you can either hover over the menu to select it or right-click to open it in a new tab. For enhanced workflow efficiency, users can also use Ctrl+click (on Windows) or Cmd+click (on Mac) to open modules in new tabs.
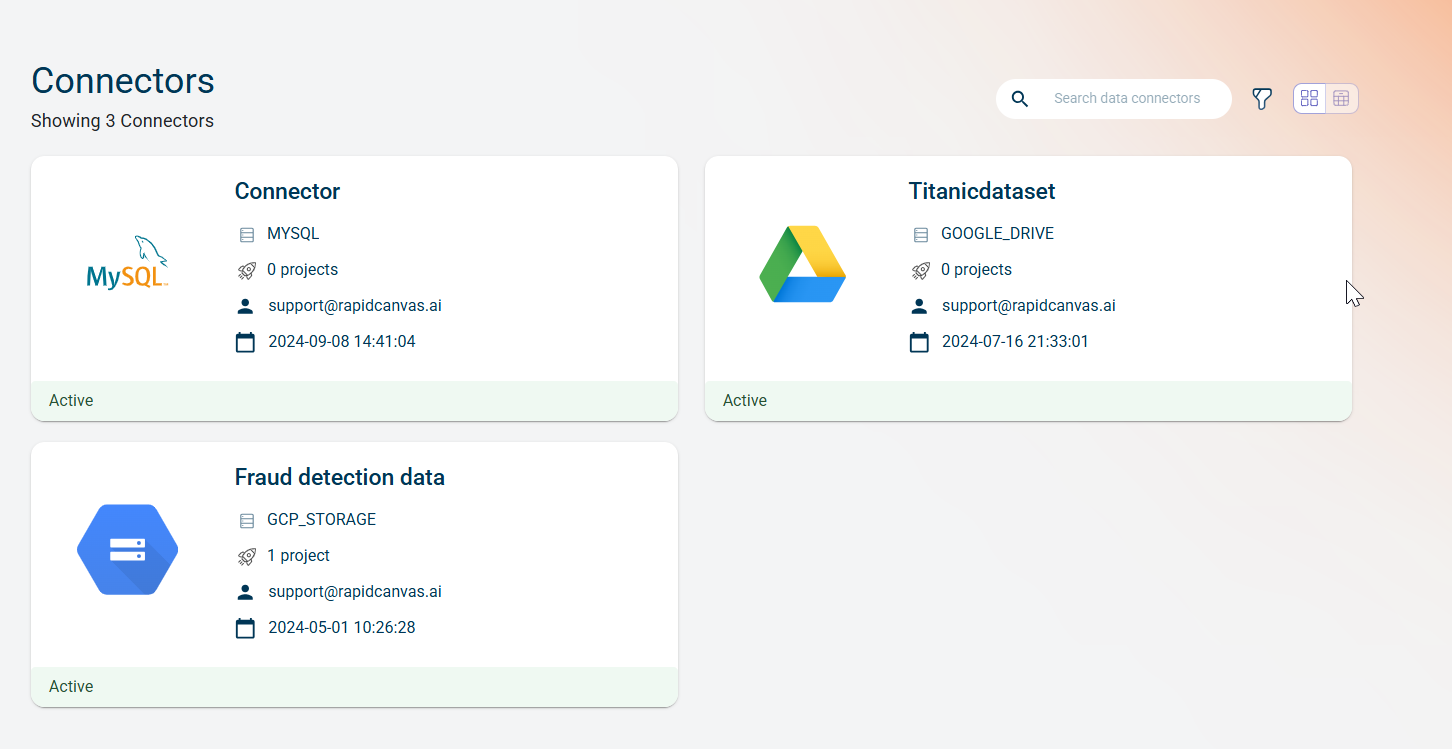
Connectors
Connectors view shows a list of all existing datasource connections created under the workspace. Users can switch between a card view and table view. Also, can create a new datasource connections.
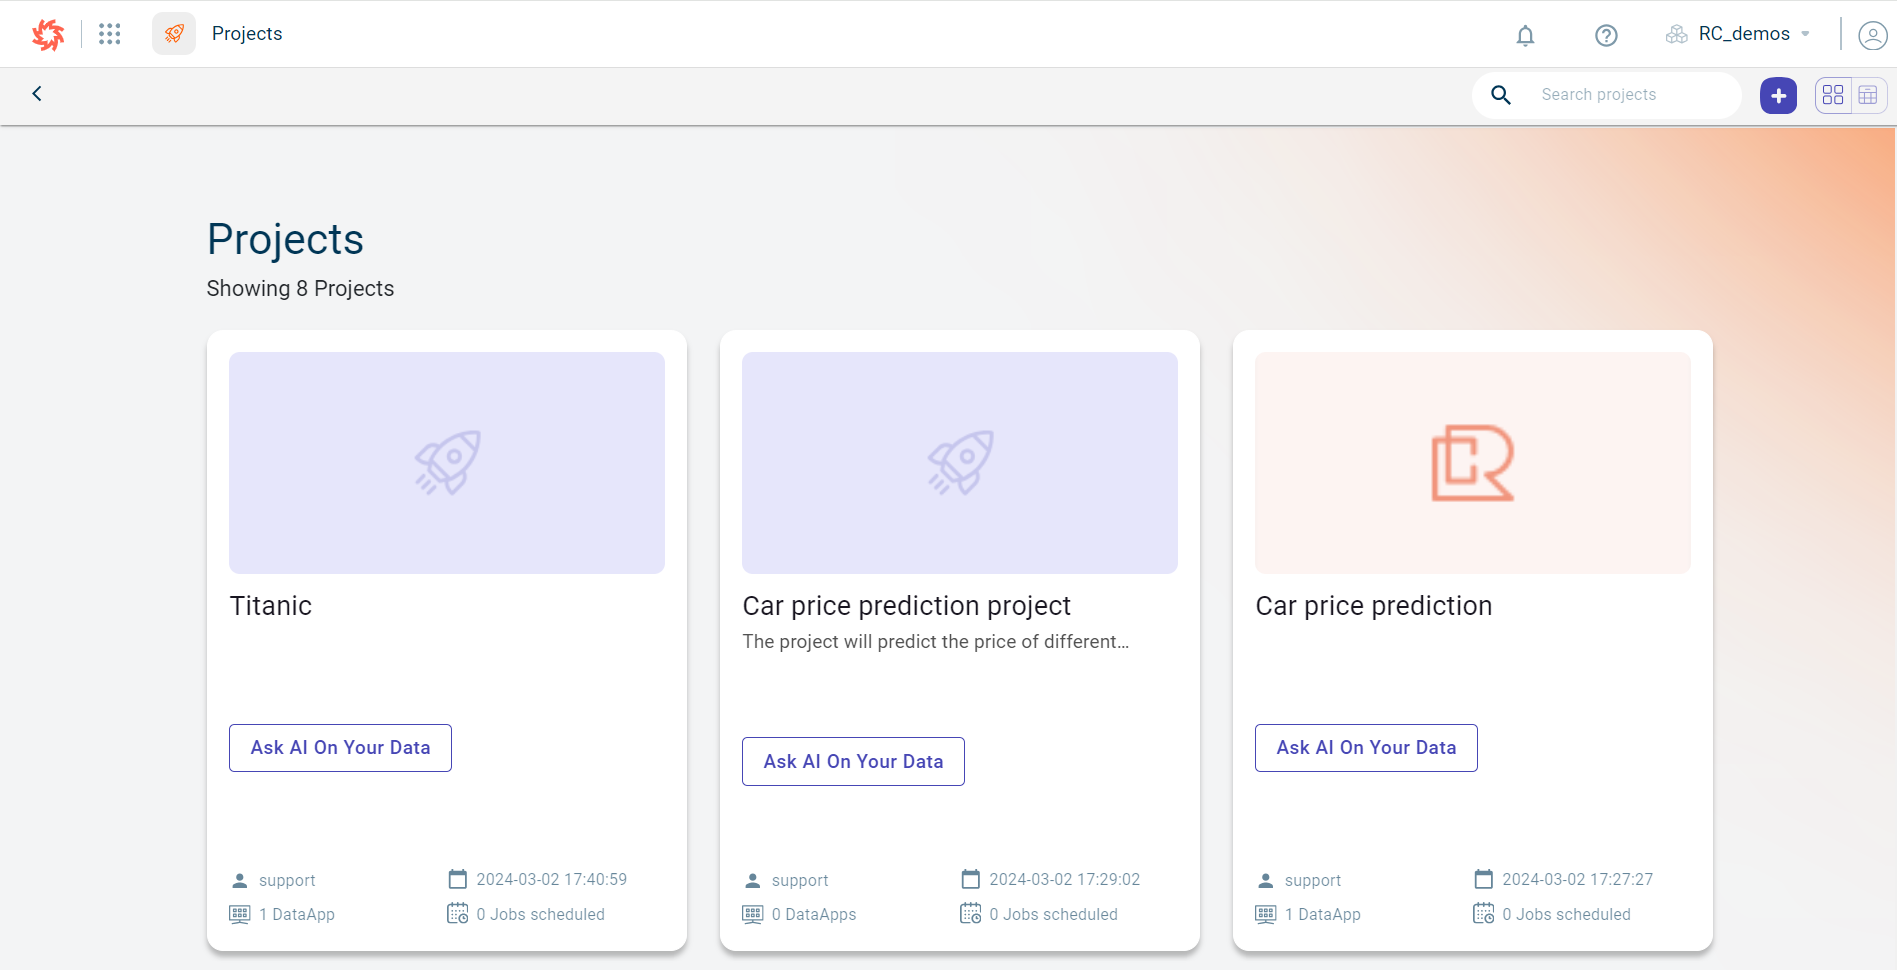
Projects
Projects view shows a list of all projects currently active for a workspace. Users can switch between a card view and table view of the project. Users can also create new projects from this view.
DataApps
DataApps view shows a list of DataApps that are created in different projects under a workspace. Users can switch between a card and table view to view the dataapp visualizations.
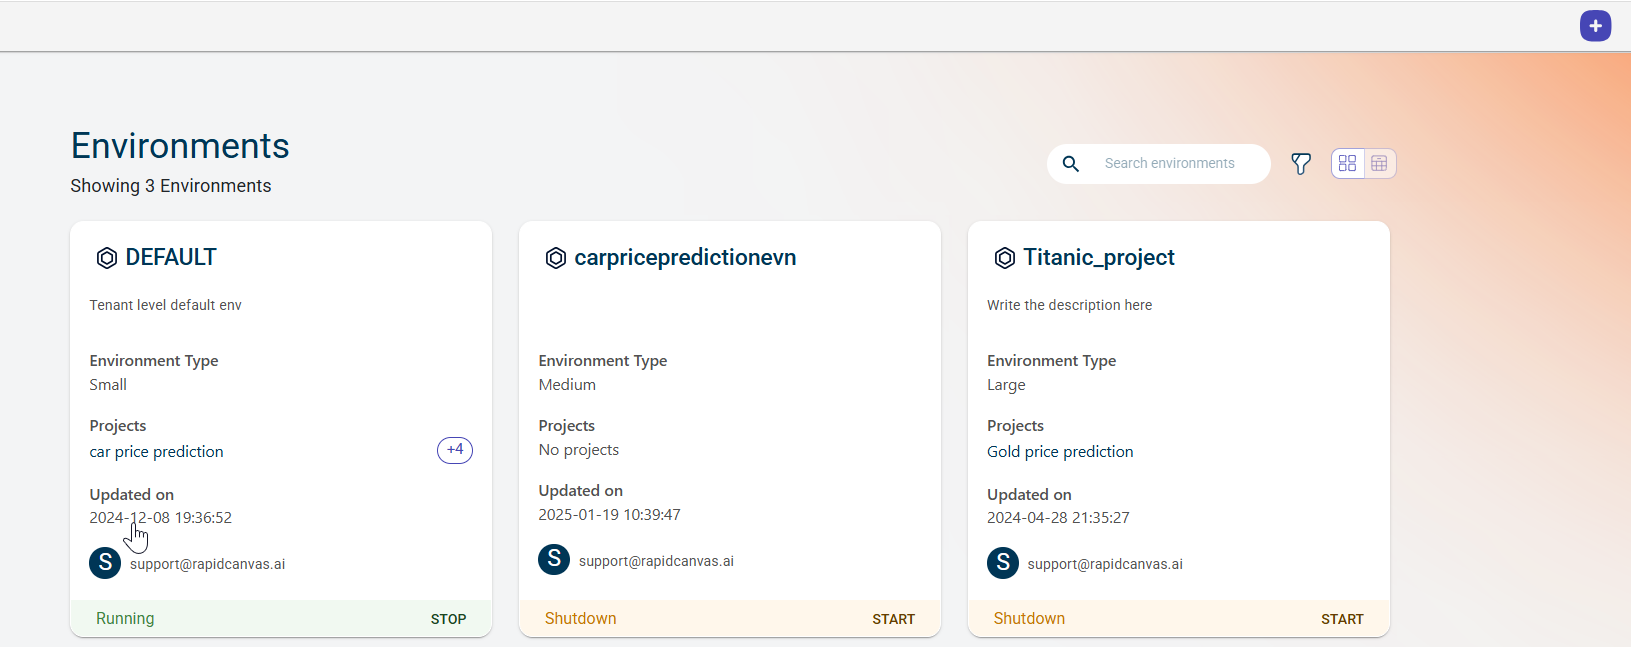
Environments
Environments view shows a list of all existing environments which were created under the workspace. Users can switch between a card view and list view. Users can also create new custom environments from this view.
Artifacts & Models
Artifacts & Models view shows a list of artifacts that are uploaded and models that are generated after running a data pipeline. You can also upload the models manually and view them.

Workspaces
Workspace management related information can be found under this link
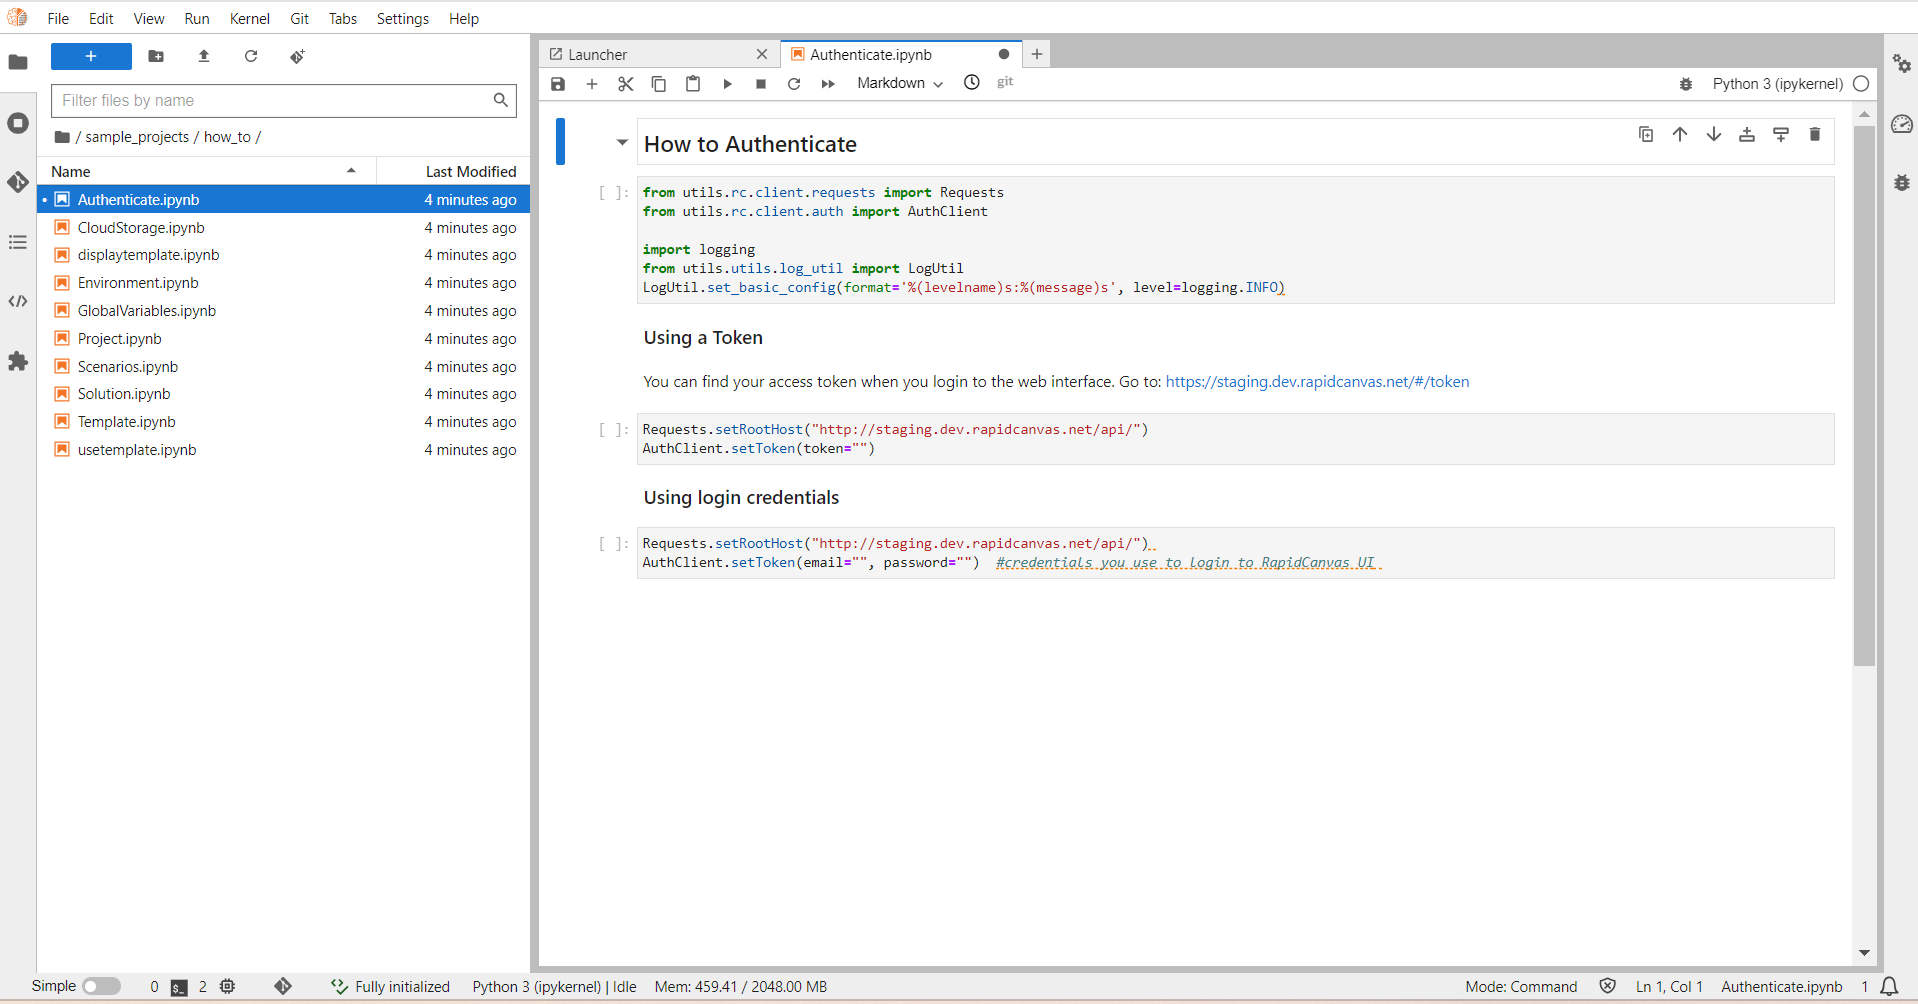
Launch Notebook
Launch notebooks allows users to launch an integrated hosted jupyter-hub associated with the user and workspace. Users have the ability to refer to sample projects, how to guides and more from this interface. Users can launch new notebooks and create new projects on RapidCanvas directly from this interface


More information on how to use hosted notebooks can be found here:
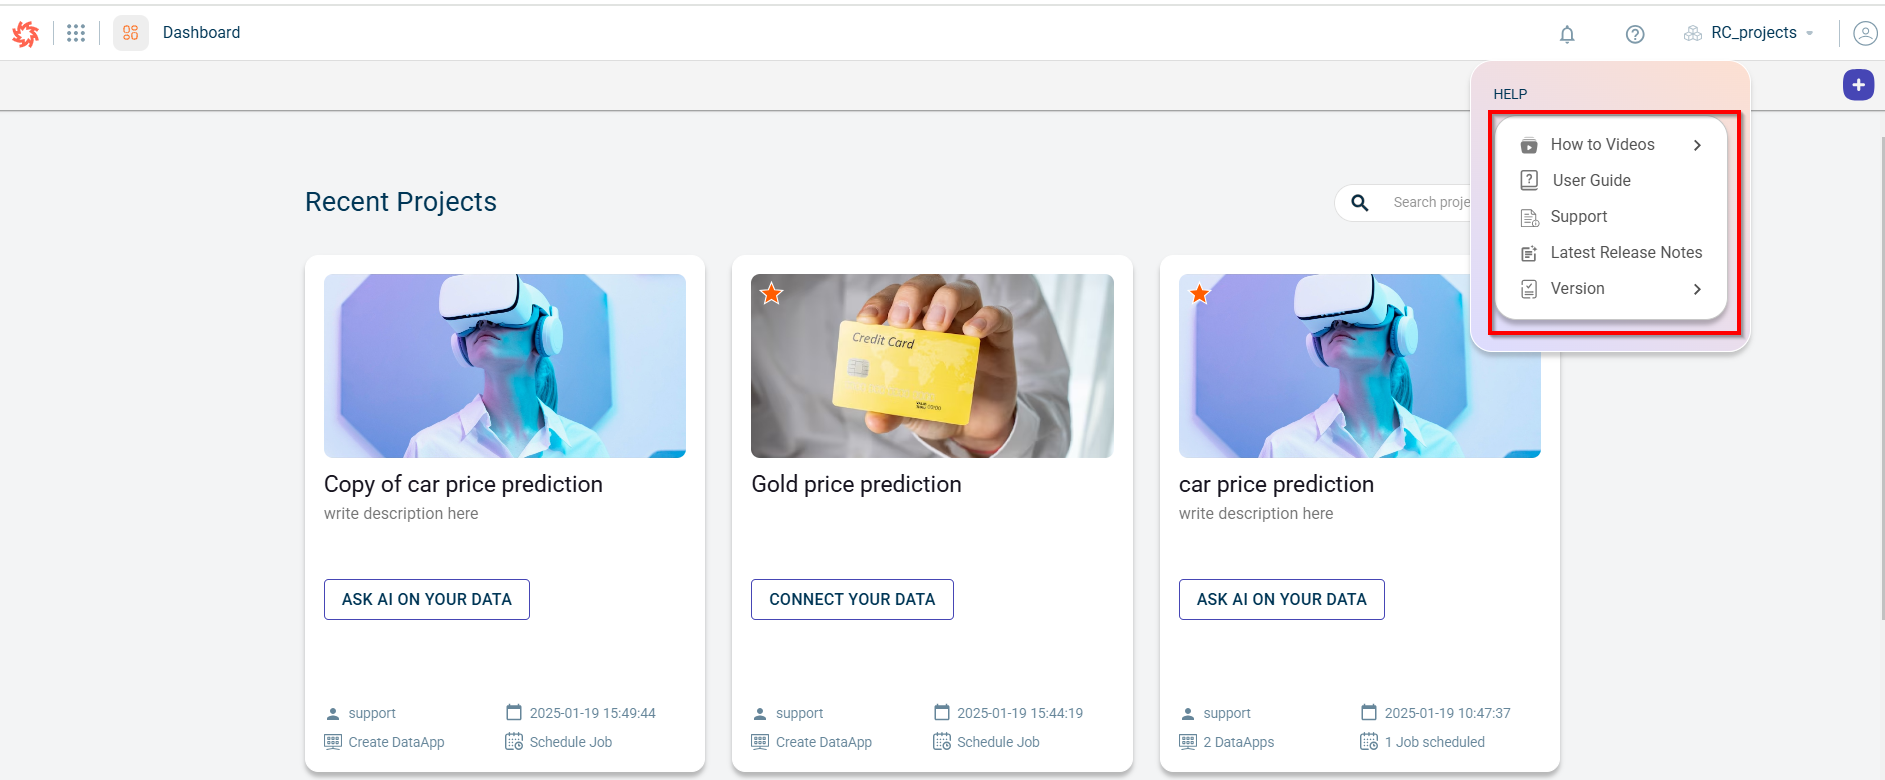
Help
The comprehensive documentation for the RapidCanvas application can be accessed by clicking the “User Guide” option on the RapidCanvas platform. This guide provides detailed instructions on how to use each functionality to build data pipelines. Additionally, it includes videos that help users understand various features and offers a provision to raise support tickets.
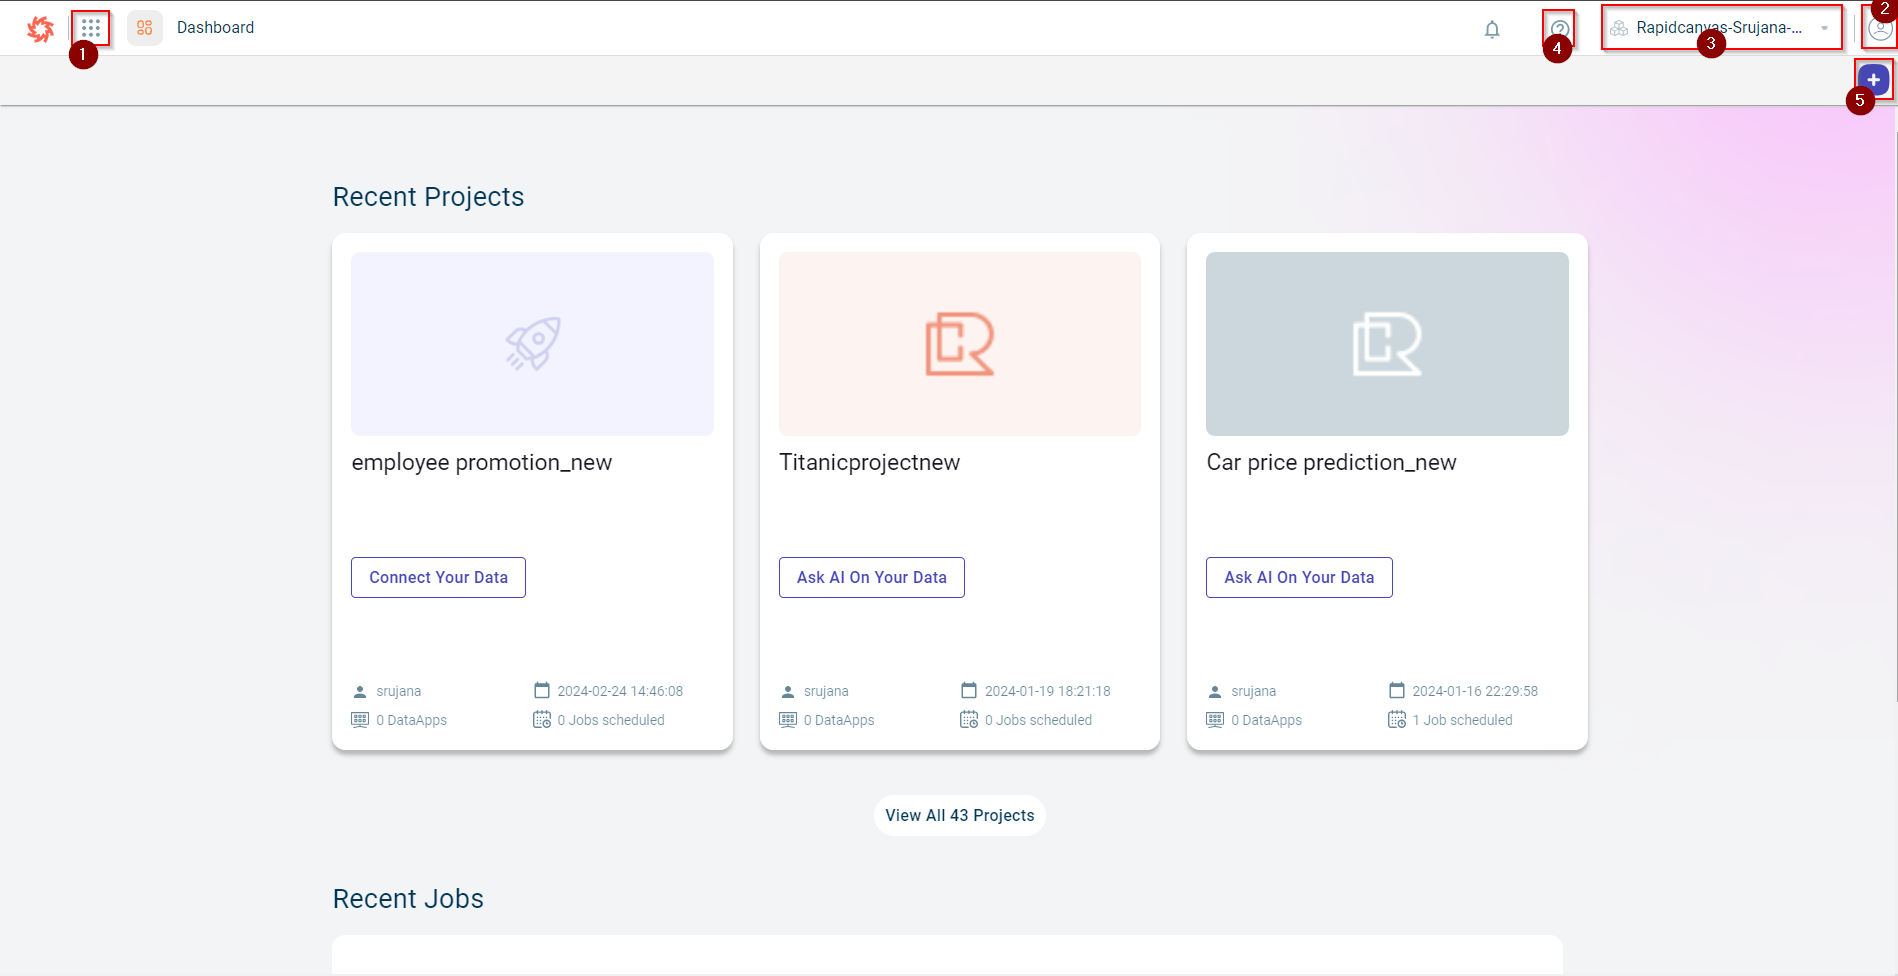
Navigating through the dashboard
After signing in to the platform, you are directed to the Dashboard, which serves as the home page. The Dashboard offers an overview of various components within the application, allowing you to easily navigate and manage your work:
Recent Projects: Displays a list of projects you have created, shown in a card format for quick access. You can click on any project to view or edit it.
Recent DataApps: Shows the DataApps you have created across different projects, providing easy access to their details and settings.
Recent Jobs: Lists the jobs scheduled within various projects.
Notifications: Displays the most recent 15 notifications, highlighting actions performed across various modules. You can quickly view updates, such as when a DataApp was launched, when a recipe was executed, when an environment was launched, along with its status.
Help: Provides direct access to help documentation, release notes, instructional videos, and the latest platform version. You can also use this section to raise support tickets if you encounter any issues or need assistance.
Tenant Switch: Allows you to seamlessly switch between different workspaces, ensuring you can easily manage multiple environments.
User Profile Settings: Lets you view and manage your user profile, including details about the workspaces to which you have access. You can update your profile information as needed.
Search: Offers a search bar where you can quickly find a project, DataApp, or job by name, streamlining your navigation across the platform.
Create a New Project: Provides a straightforward option to start a new project, guiding you through the initial steps of project creation.
The Dashboard serves as a central hub for managing and interacting with all aspects of the platform, ensuring a seamless and efficient user experience.
Dashboard
The dashboard shows the list of projects developed within a workspace. It provides access to view and create projects. You can also use this to navigate back to the landing page. Any project created in your current workspace will appear on the dashboard page.
Help
User guide - This area gives you access to the comprehensive documentation that helps you get started with the application.
How to Videos - This provides users with comprehensive videos to understand and use each functionality in the application.
Contact support - This area gives you access to the help center to submit a request or incident.
Version - This area displays the current platform version and the SDK version (Jupyter notebook) used to connect with RapidCanvas.
Latest Release Notes: This section allows you to view the latest release notes and get familiar with the new features and enhancements added to the platform in each release.
Current workspace
This shows the workspace that you are currently active in.
User profile
This provides you access to the profile section. You are allowed to view and edit the profile settings and sign out from the application.
Notifications
This provides timely and important notifications to users whenever the allocated memory or CPU consumption exceeds thresholds within projects and dataapps. You also receive notifications:
When the dataapp is launched successfully or failed to launch
When the chart is generated in data analysis
When the recipe run is successful or encountered failure
When prediction jobs and react DataApps are successful or encountered failures
When the environment is relaunched
When you the project job run is failed or successful
When the about snippet is generated
When the AI summary is generated
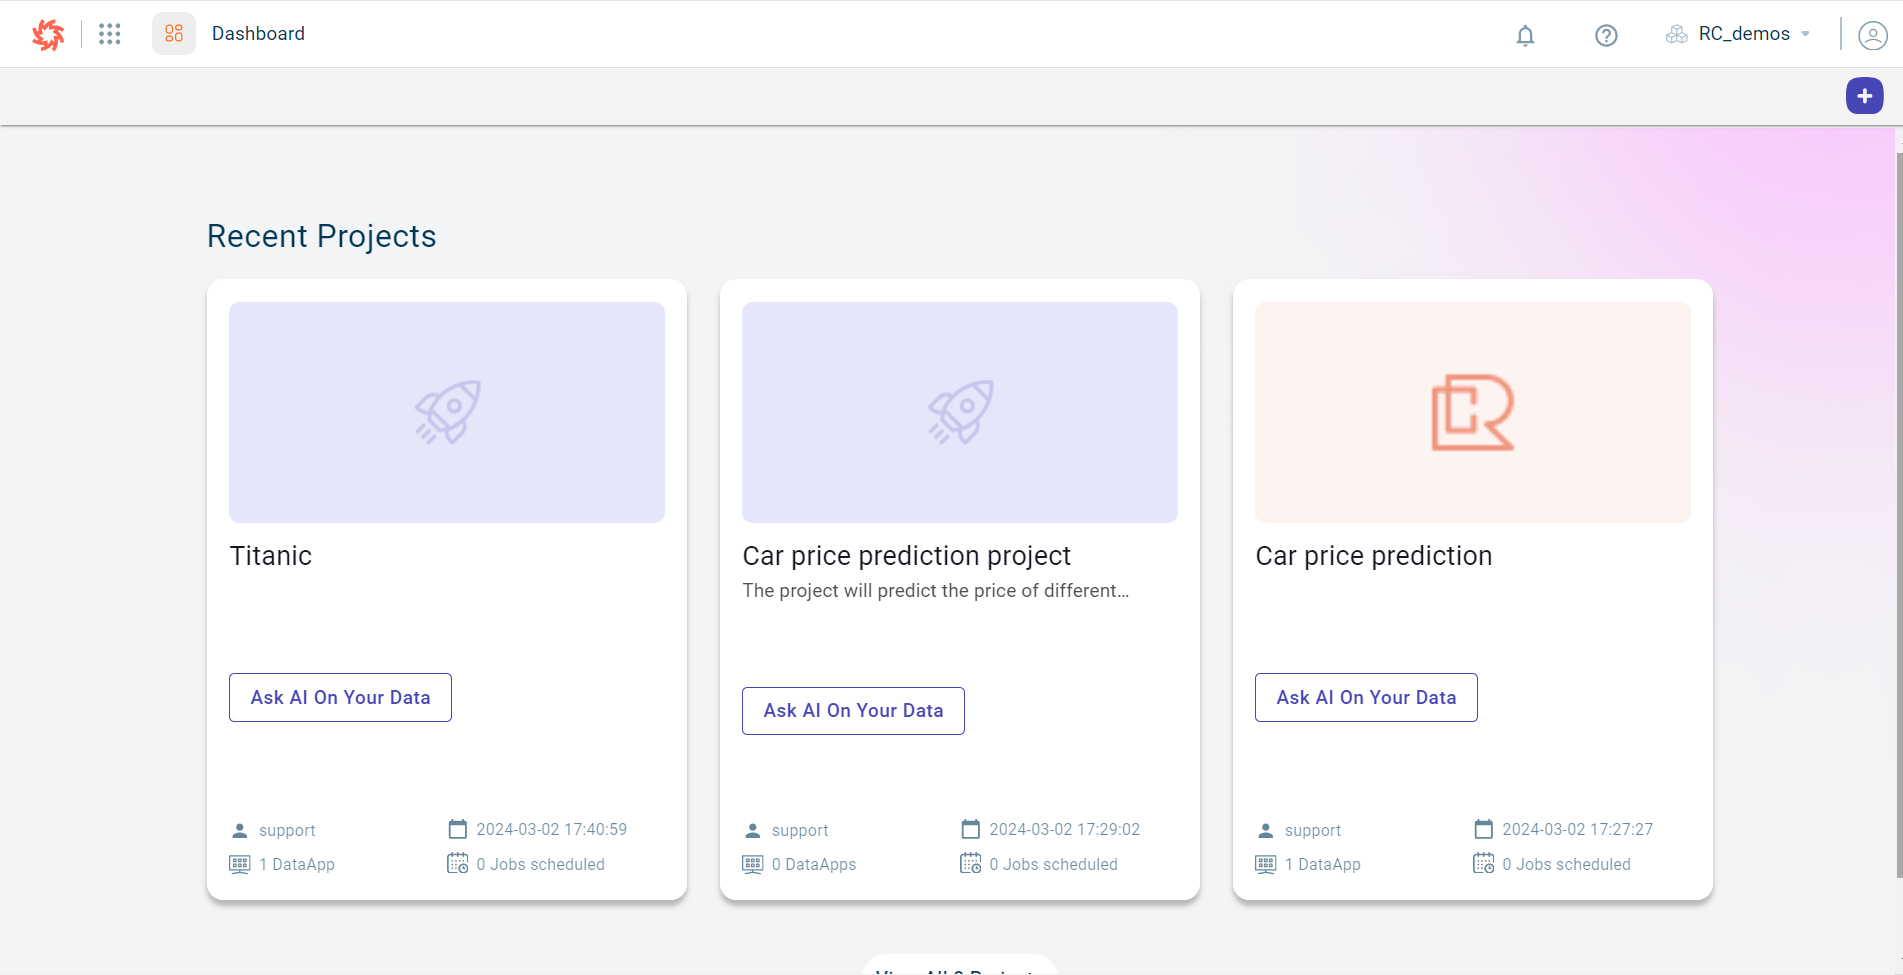
Recent Projects
This shows you the list of projects available in a workspace at any given point in time. On a project tile, you can view the following details:
Project name - The name of the project.
Description - The description of the project.
DataApp- The total DataApp created in a project.
Jobs - The total number of jobs created in a project.
Last updated on - The date on which the project was last updated.
User- The user who last made changes to this project.
Recent Jobs
This displays the list of jobs scheduled in different projects under this workspace. Click on a job to navigate to the Jobs page. You can view the following details:
- Job name:
The name of the job.
- Project:
The project in which this job has been created.
- Last 5 Run Status:
The last five job run status.
Global search
The Global Search provides users with a powerful, unified search bar accessible at the top of every page, enabling quick and efficient navigation across the application. It simplifies finding specific elements without manually browsing through multiple sections.
Searchable Elements Include:
Users can search for a wide range of elements, including:
Projects – Quickly locate projects based on their names.
Recipes – Search for AI-assisted, Rapid Model, Template, or API Connector recipes used on the canvas.
Datasets – Find datasets used in different projects.
Charts – Locate charts created for data visualization in any of the projects by name.
Project Models – Access models associated with specific projects searching by name.
Project Artifacts – Search for artifacts linked to a project.
DataApps – Quickly find and open imported and custom-built DataApps.
Environments – Locate computing environments for executing workflows.
Connectors – Search for external data sources.
Predictions – Find prediction results generated from models.
Schedulers – Identify scheduled jobs or automation workflows.
Vector Databases – Search for vector-based nodes used in AI-driven applications.
Files – Locate uploaded files stored within the application.
Steps to perform Global search
Use the following steps to perform a global search.
Select Search Scope – Choose “All” to search across the entire application or select a specific element (e.g., Projects, Datasets, Recipes) to refine your search.
Enter Keywords – Type relevant keywords in the search bar. The system dynamically filters results, matching the keyword across the selected elements.
View & Navigate – Browse the search results, select the desired item, and navigate directly to its corresponding page.